8x8 Work for Hubspot Integration: Minimum Required User Access Rights for Authenticating the 8x8 Integration
Objective
Hubspot requires that users have a minimum access level to their service in order to validate external applications, allowing them to access and store data in Hubspot.
This guide will show you the specific levels of Hubspot service access required per user to authenticate the 8x8 Work integration.
Updated: 2023-05-31
Since this article was first published, Hubspot has made many changes that can affect the requirements of user permissions for installing the 8x8 integration. We've updated this article to try to bring it more in line with the current required minimum permissions.
However, note that you (the Hubspot administrator) may still need to alter user permissions to allow them access to specific objects, and then test your configuration to insure that the user can not only install, but also properly use the 8x8 integration.
Important Note: Once a user has authenticated the 8x8 integration for use in Hubspot, any undesired access rights for that user can be revoked.
The user's initial authentication process only needs to be performed once. The integration will remain authenticated regardless of future user access rights in Hubspot.
Applies To
- Hubspot
- 8x8 Work for Hubspot Integration
- 8x8 Contact Center (VCC) for Hubspot Integration
Setting Minimum Access Requirements for Users
The changes in this section must be performed by a Hubspot Administrator.
To change the security properties of users:
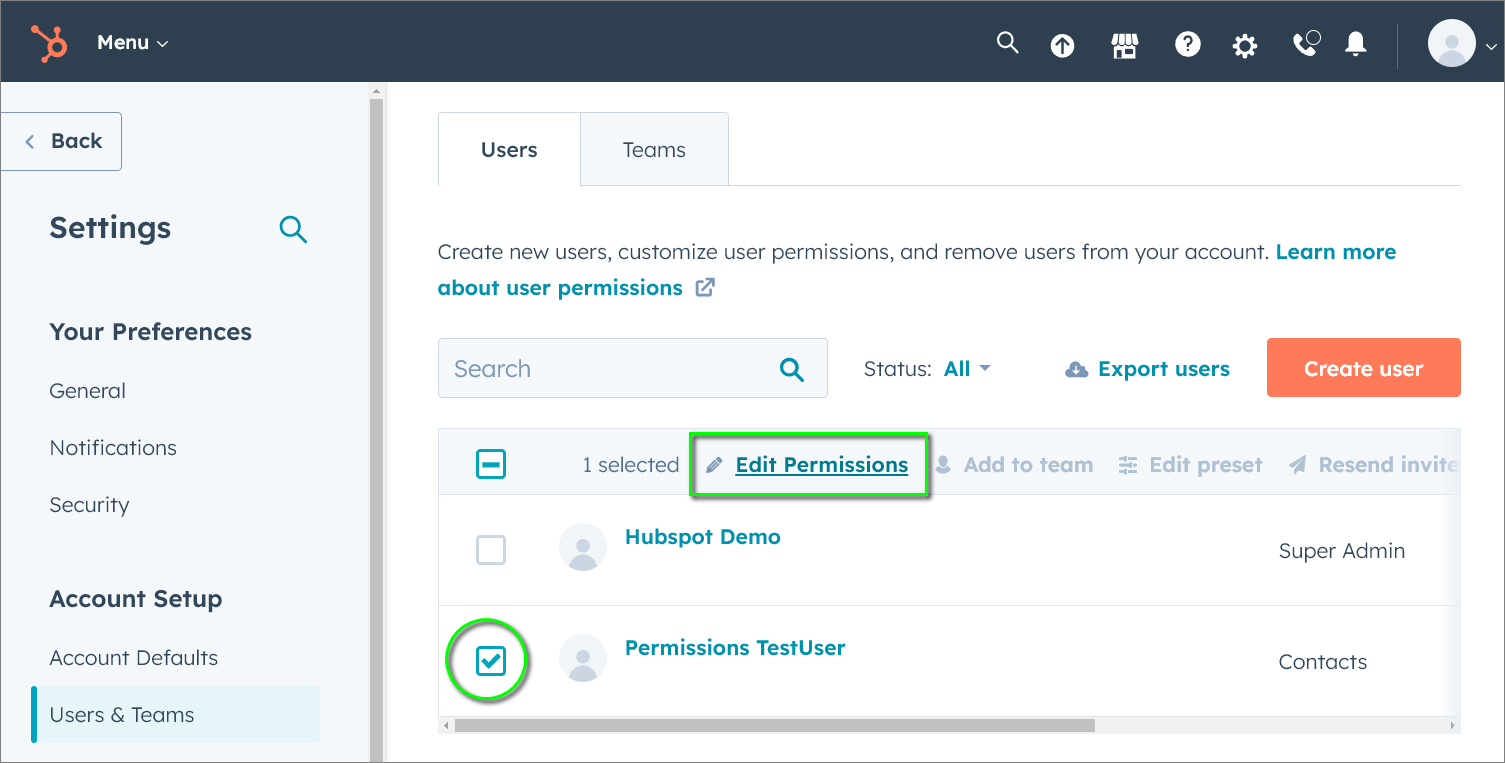
- Log into Hubspot as a Super Admin.
- Click on the Settings gear icon
 at the top-right of the screen.
 - In the navigation area at the left, go to Settings > Account Setup and click Users & Teams.
- Select the individual Users or Teams that you'll be changing, and click Edit Permissions.
- Edit the various permissions of your Users or Teams to allow them permission to install the 8x8 integration.
- Example screenshots are shown below as permissions guides.
- Be sure to Save your changes.
- Have your user(s) test the 8x8 integration installation to verify that it works.
Minimum Permission Settings
Note: If the suggested settings fail to provide the user with the ability to authorize the 8x8 integration, you may need to temporarily provide the user Super Admin access so they can do this. Please see this article for details.
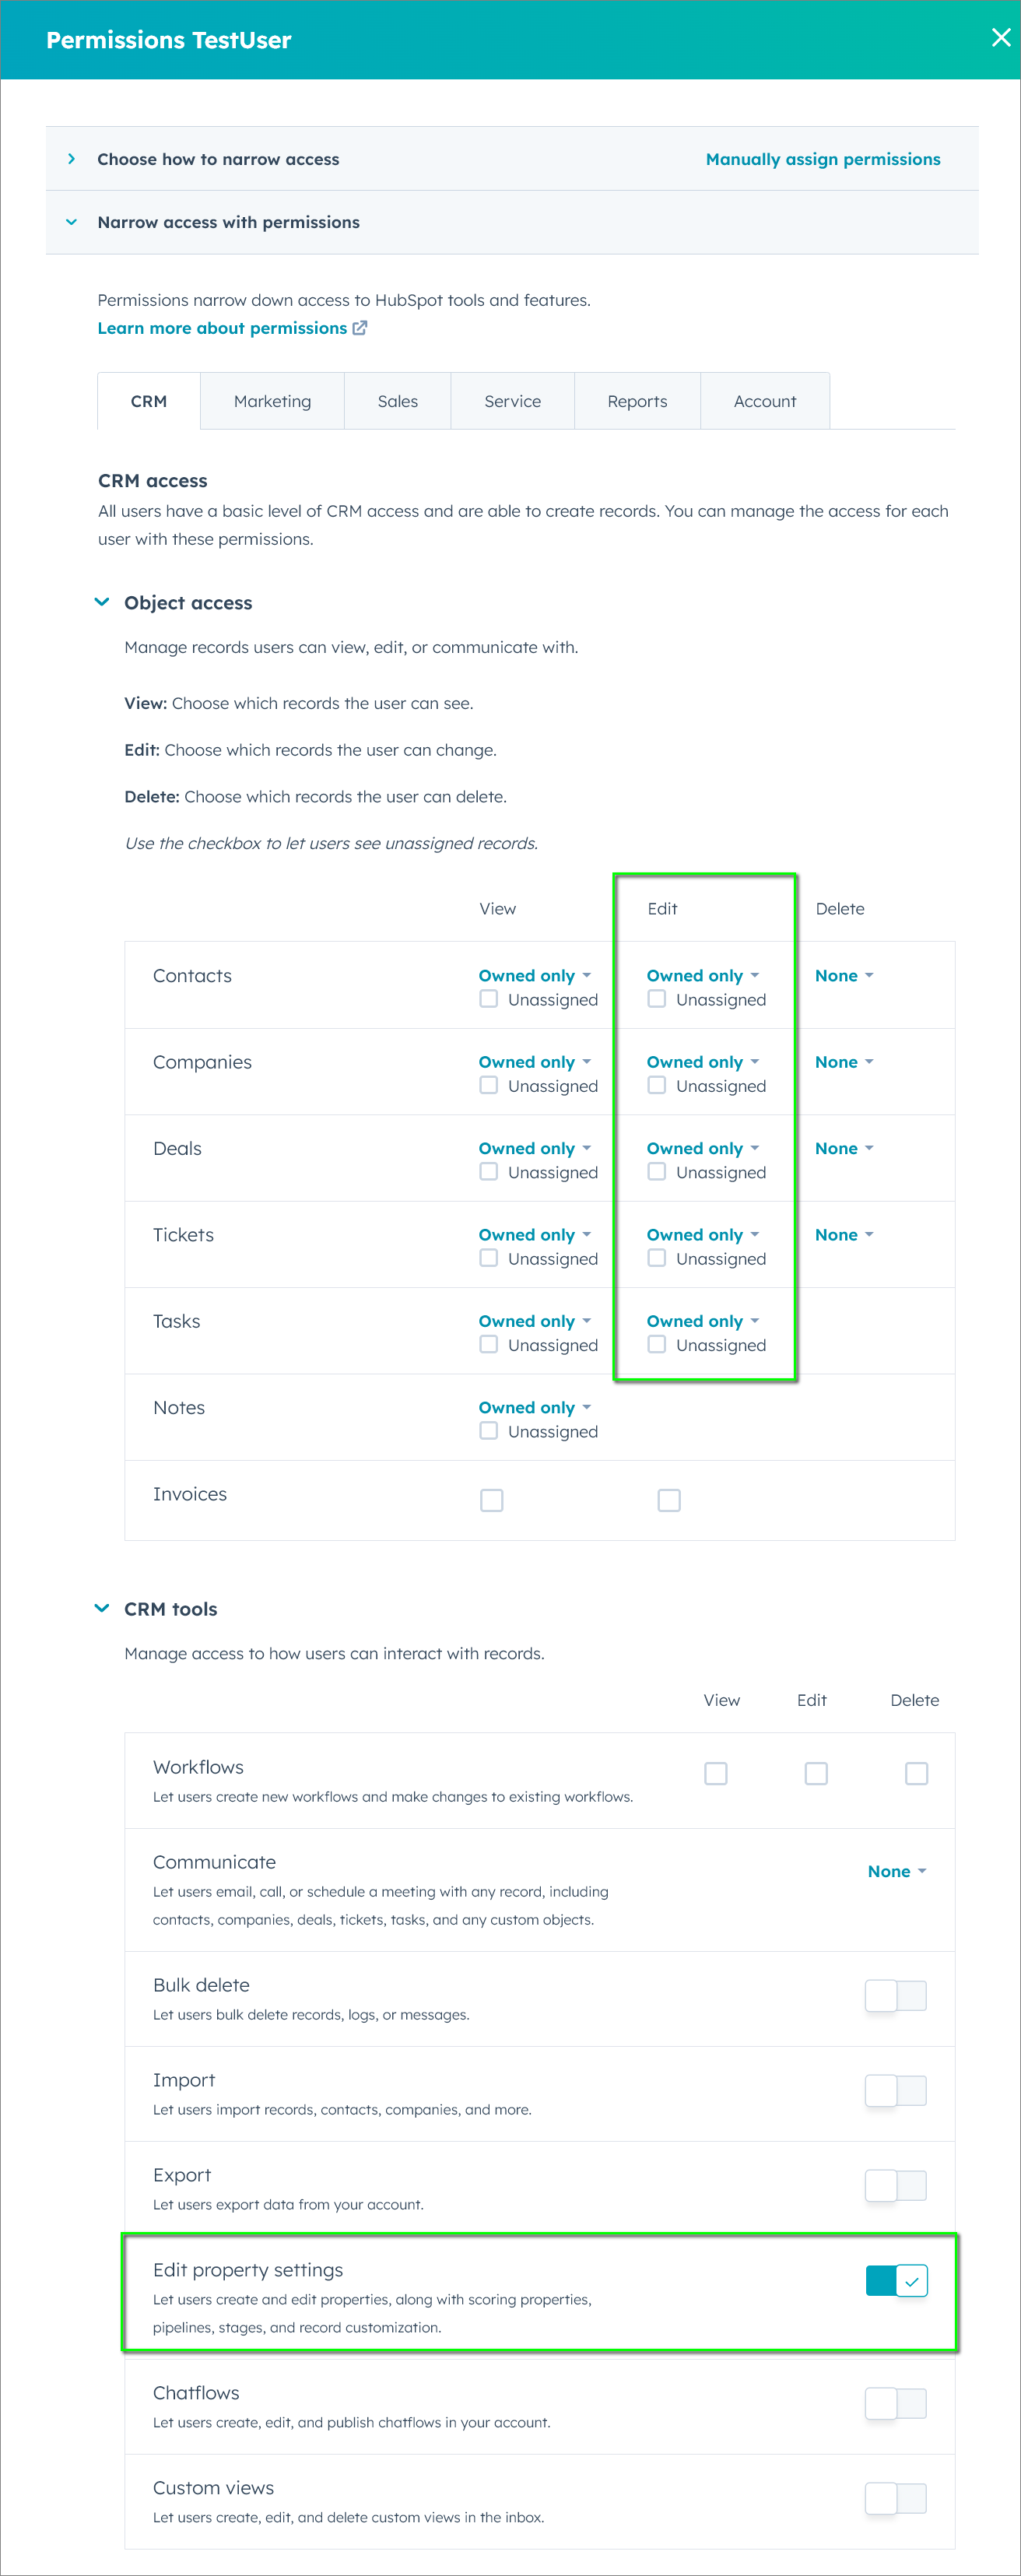
The screenshots below may be used as guides. Note that the ability to Edit objects is critical, because the 8x8 integration performs object edits as part of it's functionality.
This is a complete listing of minimum object permissions which should allow users to install the integration:
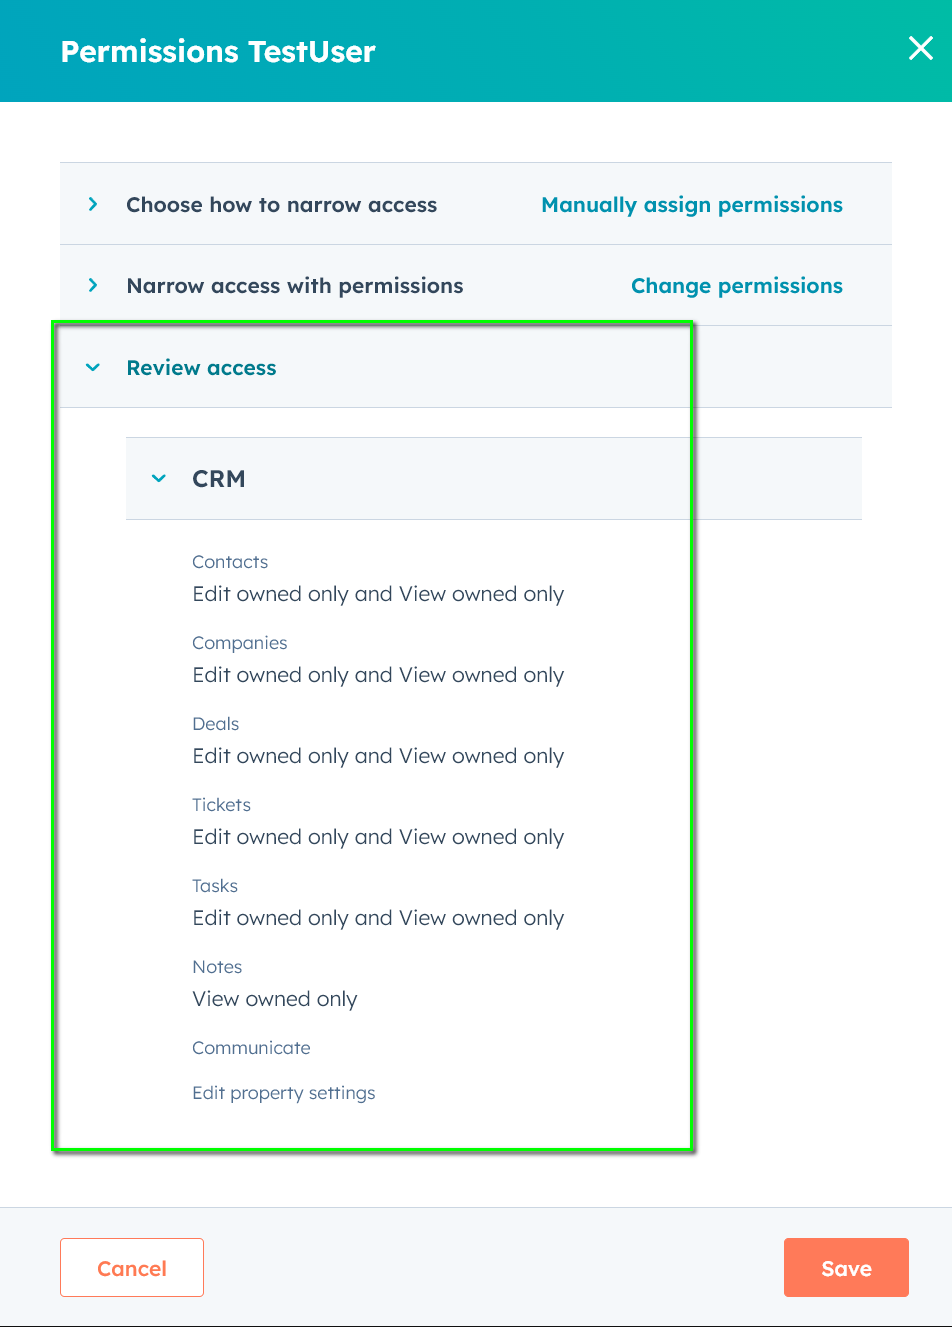
This is a distilled access review of the above permissions:
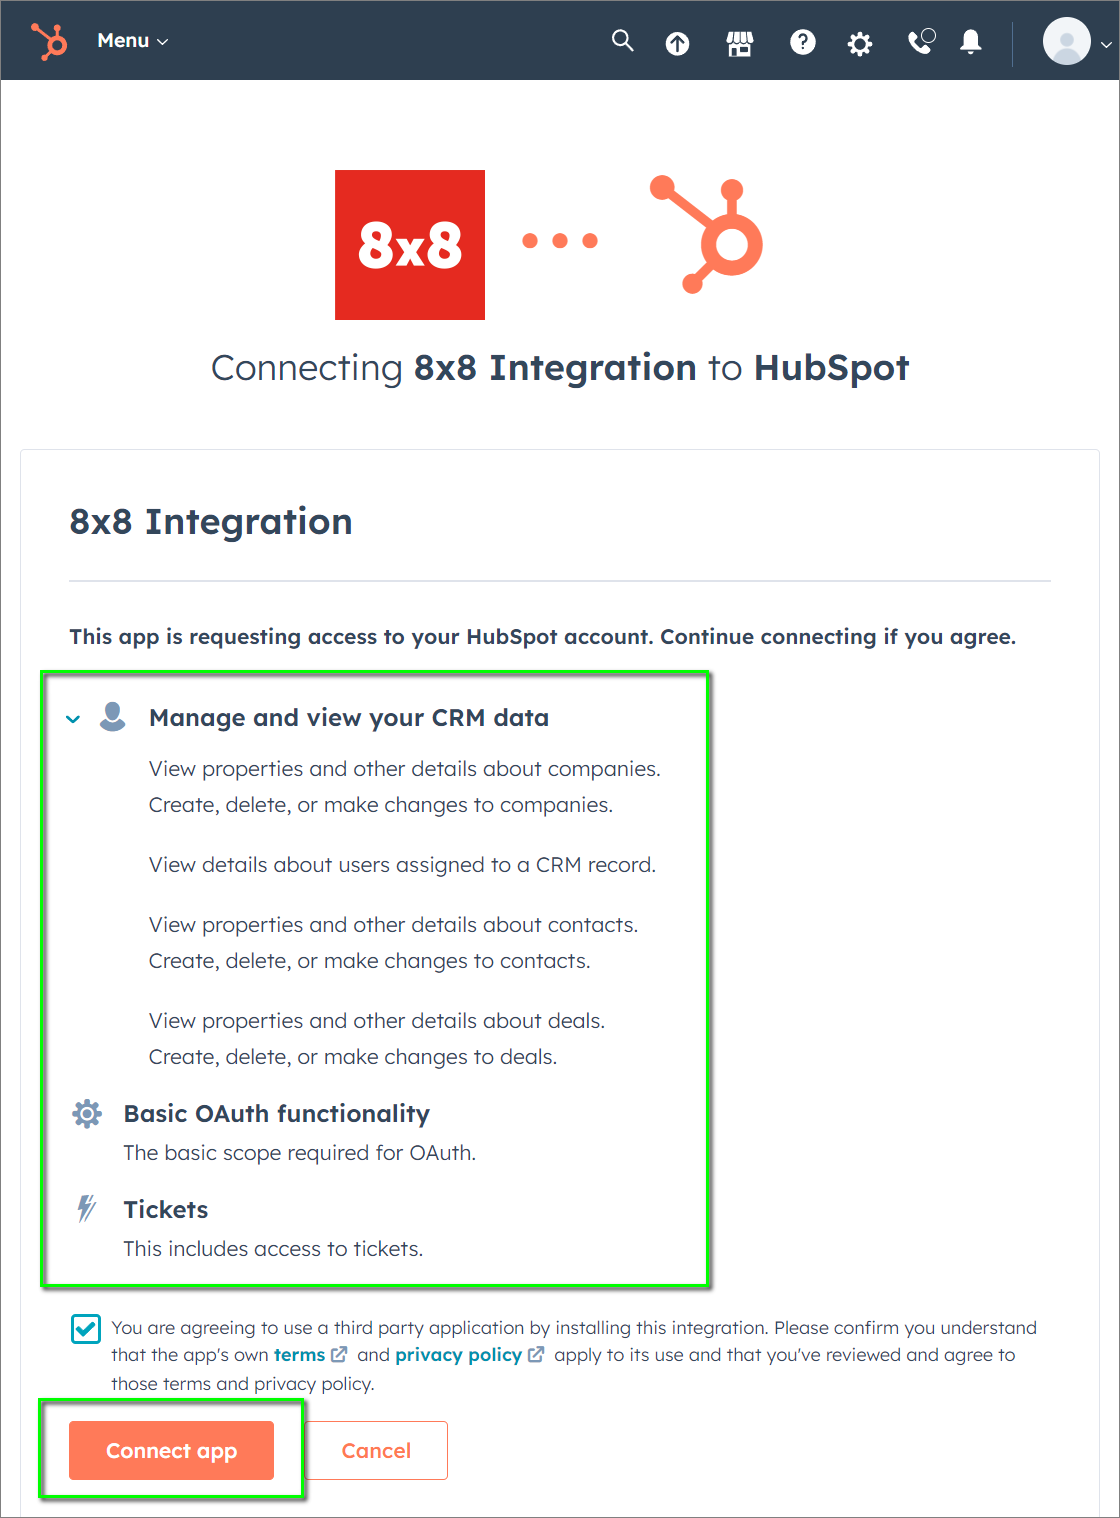
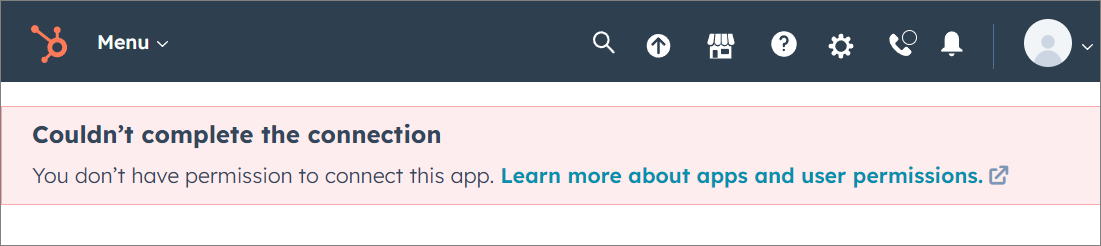
This message will be displayed to a user when the installation fails for them:
And finally, this message will be displayed if the assigned permissions are adequate. The user should then click the agreement checkbox, and then click Connect app to complete their installation.
Note the various access permission levels that are listed. Access to object deletion is not really required: