8x8 Sales Workspace: Configure Salesforce Opportunity Due Date and Notes Fields
Overview
8x8 Sales Workspace provides additional functionality in the 8x8 Work environment, targeted specifically at enhancing the sales workflow of sales users of both 8x8 Work and Salesforce. It does this by importing the 8x8 Work user's assigned Salesforce Opportunity information, and then displaying that Opportunity information in 8x8 Work.
This article will show you how to configure your Salesforce Opportunity object to display two new fields that appear in Sales Workspace: Due Date, and Notes.
These Opportunity fields must exist in Salesforce for them to also be active and changeable in Sales Workspace.
Applies To
- 8x8 Work
- Sales Workspace
- Salesforce
- Opportunities
Procedure
Note: As a Salesforce administrator, if you already know how to add new fields to your Salesforce objects, here is the critical data you'll need to add your two new fields to the Opportunity object.
Otherwise, all related steps are outlined below in this article.
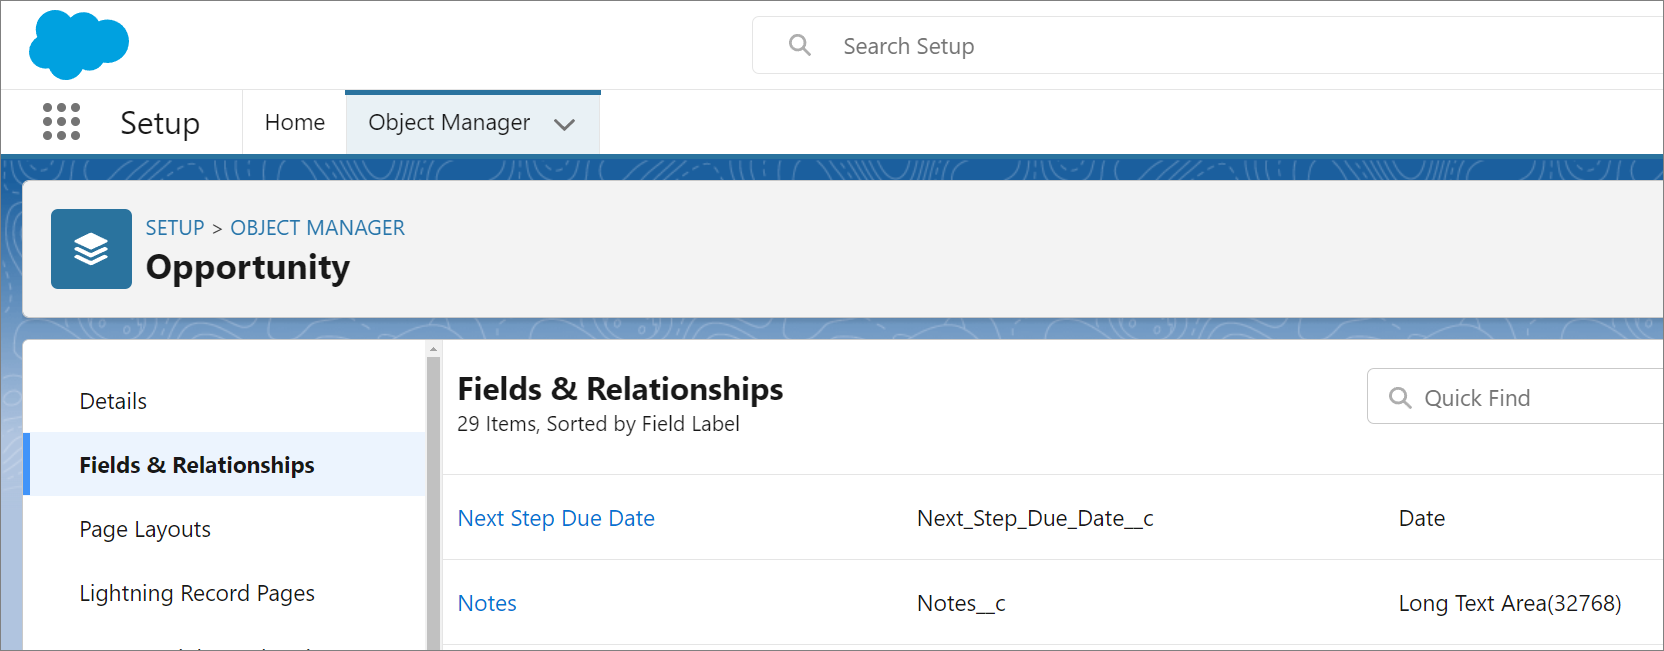
FIELD LABEL FIELD NAME DATA TYPE Next Step Due Date Next_Step_Due_Date__c Date Notes Notes__c Long Text Area(32768)

Add Two New Fields to your Opportunity Object
The steps below are required to unlock functionality for the Due Date and Notes fields in Sales Workspace, and must be performed by a Salesforce administrator.
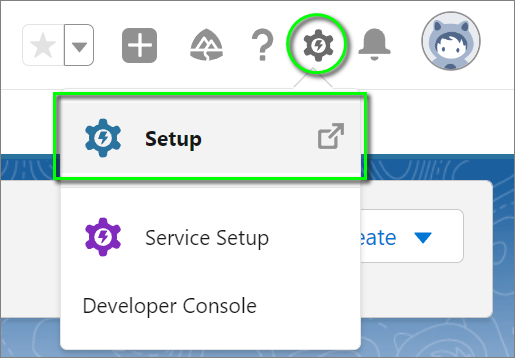
- In Salesforce, click the Setup gear icon at the top-right of the page.
- Click Setup, which will launch a new browser tab.
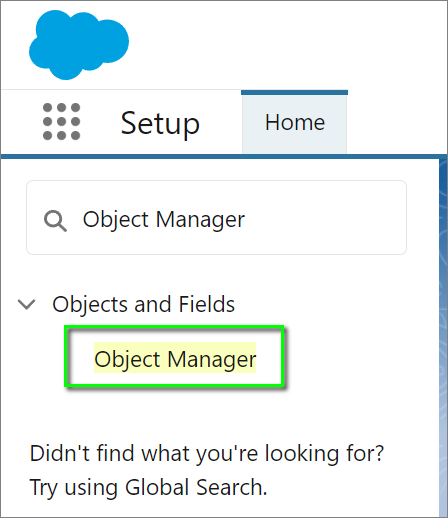
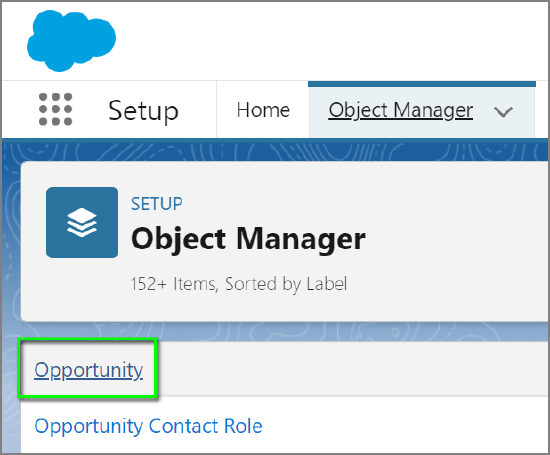
- In the Setup search pane on the left, search for and click on Object Manager.
- In Object Manager, scroll down and click on Opportunity.
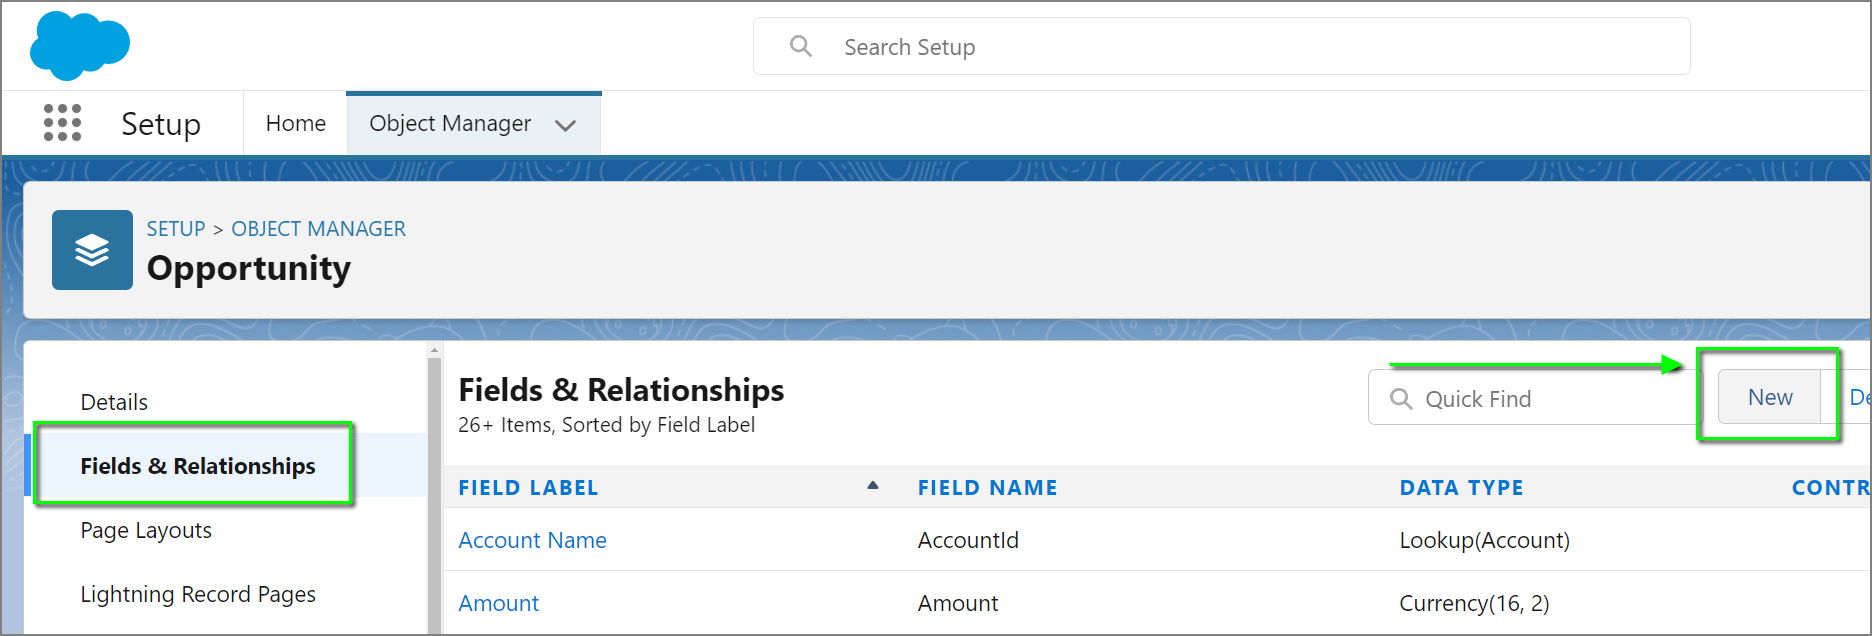
- Click on Fields & Relationships.
- Click New.
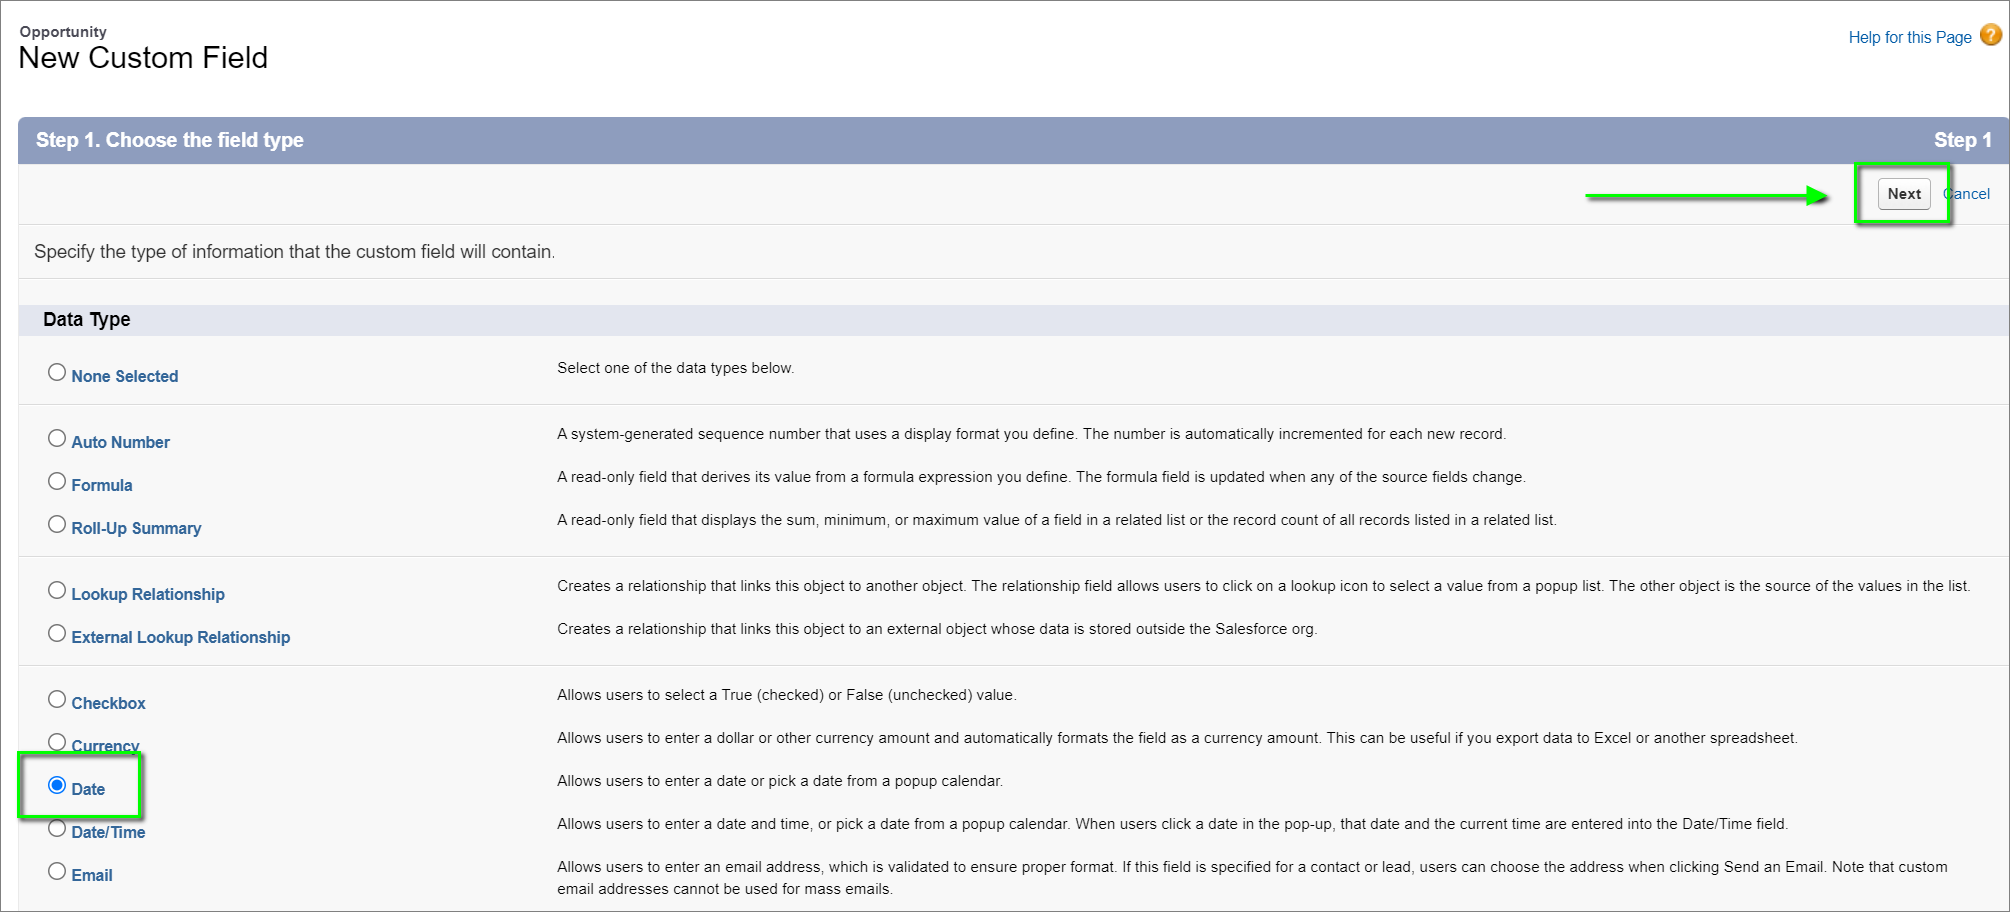
- In New Custom Field > Step 1. Choose the field type:
- Click Date to select it.
- Click Next.
- In Step 2. Enter the details:
- Enter the Field Label: Next Step Due Date
- Click anywhere out of the field, or press your keyboard's Tab key. The Field Name field should display the API name: Next_Step_Due_Date
- Click Next.

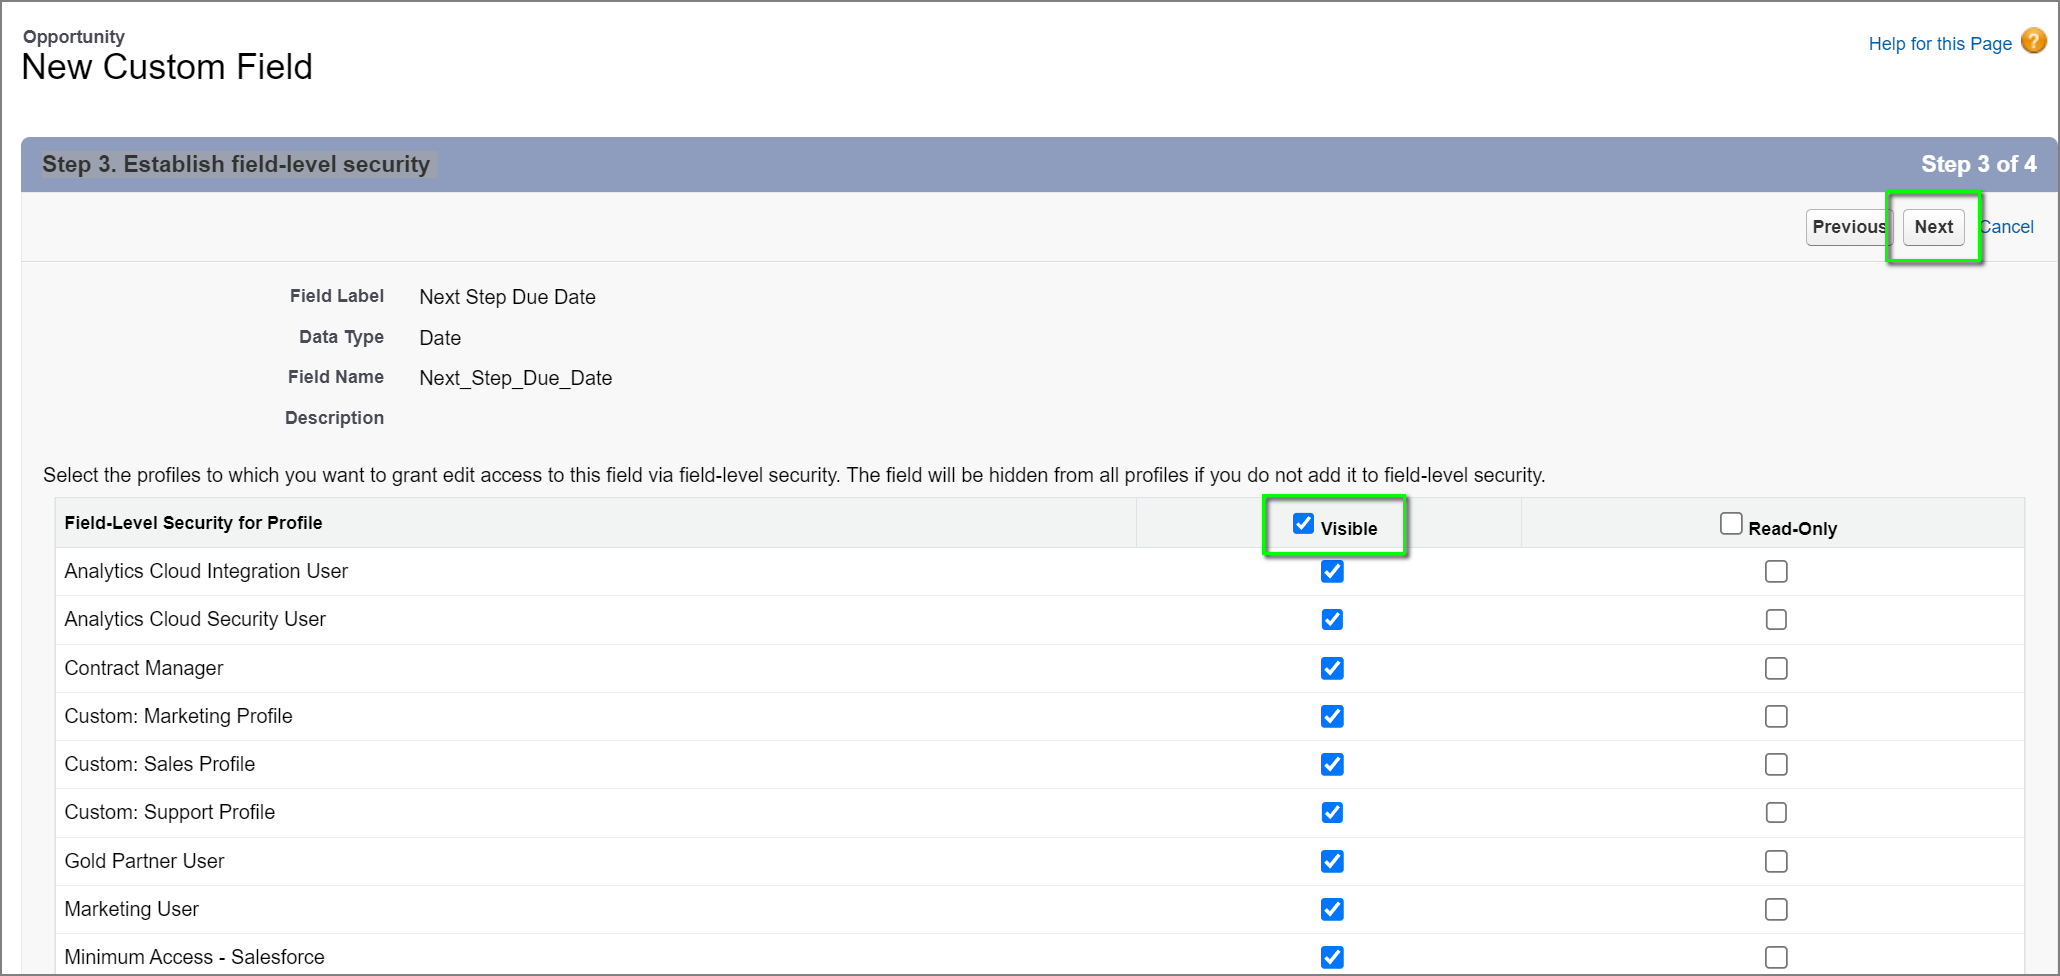
- In Step 3. Establish field-level security:
- Select the user profiles you want to apply this new field to, or just click the Visible box to apply it to all listed user profile types.
- Click Next.
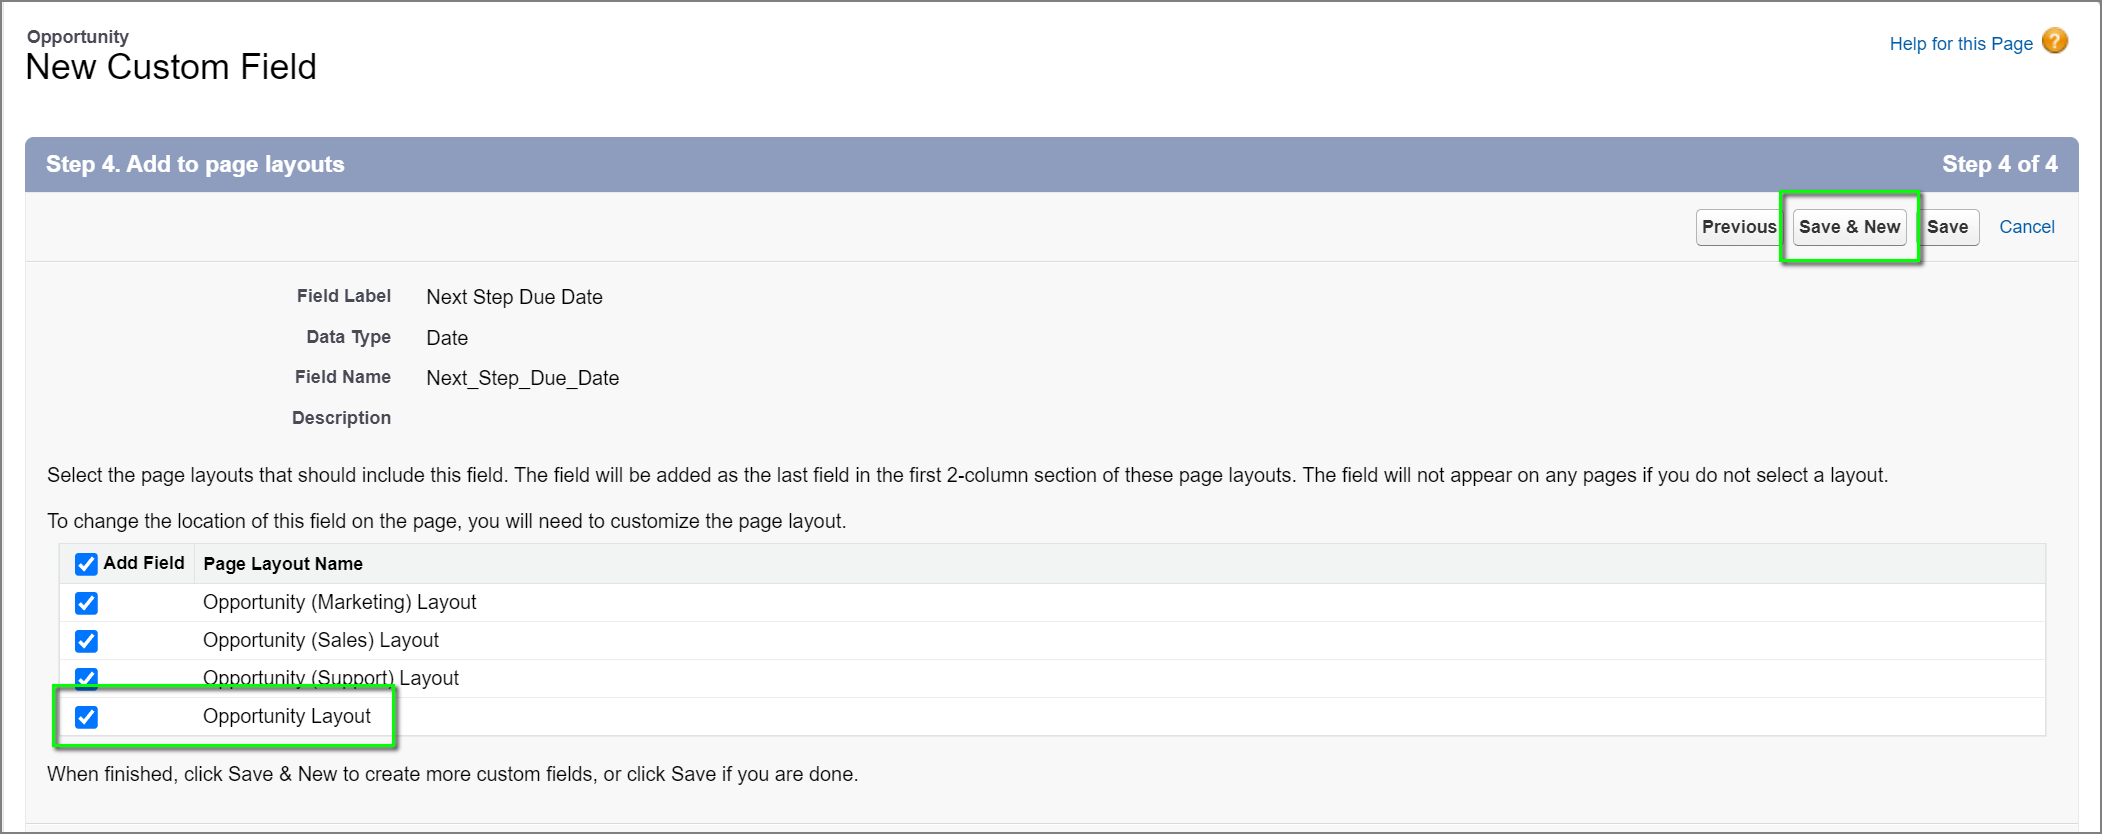
- In Step 4. Add to page layouts:
- Verify that the listed information is correct, and make any changes suited to your Salesforce org. You should not need to make any change unless you don't want to add the new field to specific listed page layouts.
- Click Save & New to begin adding the Notes field.
- In New Custom Field > Step 1. Choose the field type:
- Click Text Area (Long) to select it.
- Click Next.

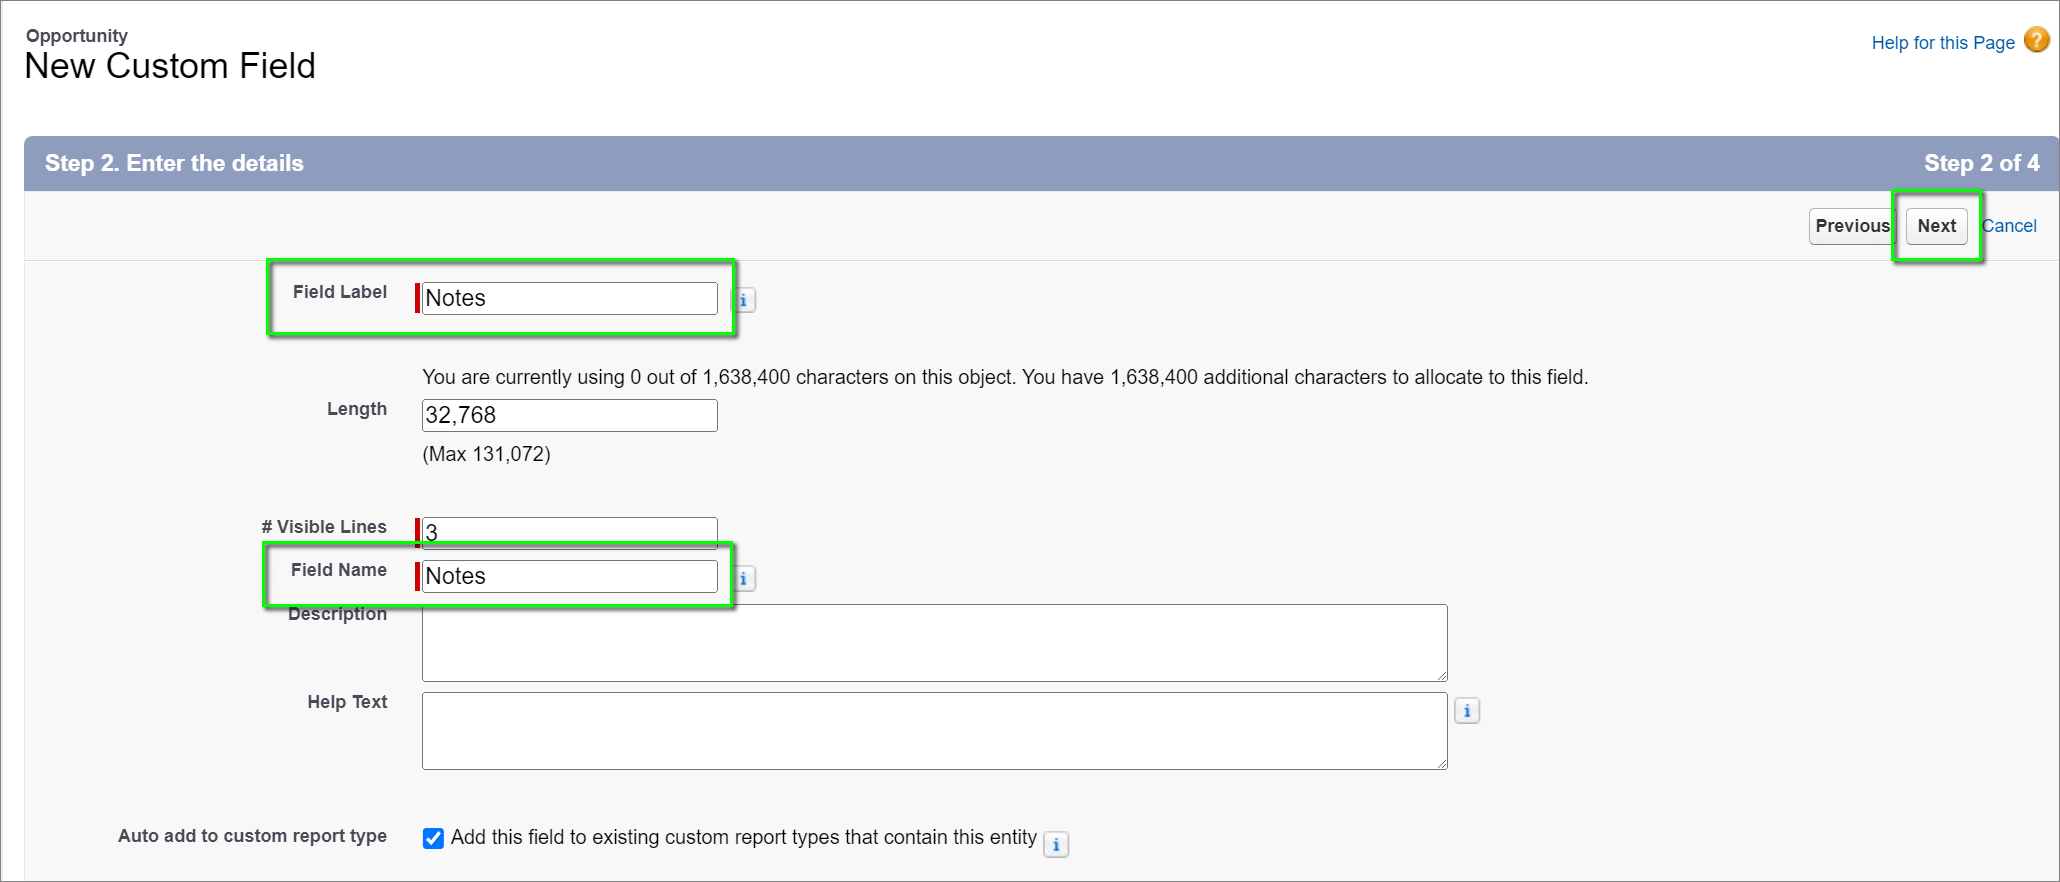
- In Step 2. Enter the details:
- Enter the Field Label: Notes
- Click anywhere out of the field, or press your keyboard's Tab key. The Field Name field should display the API name: Notes
- It isn't necessary to change the entries in either the Length or # Visible Lines fields.
- Click Next.
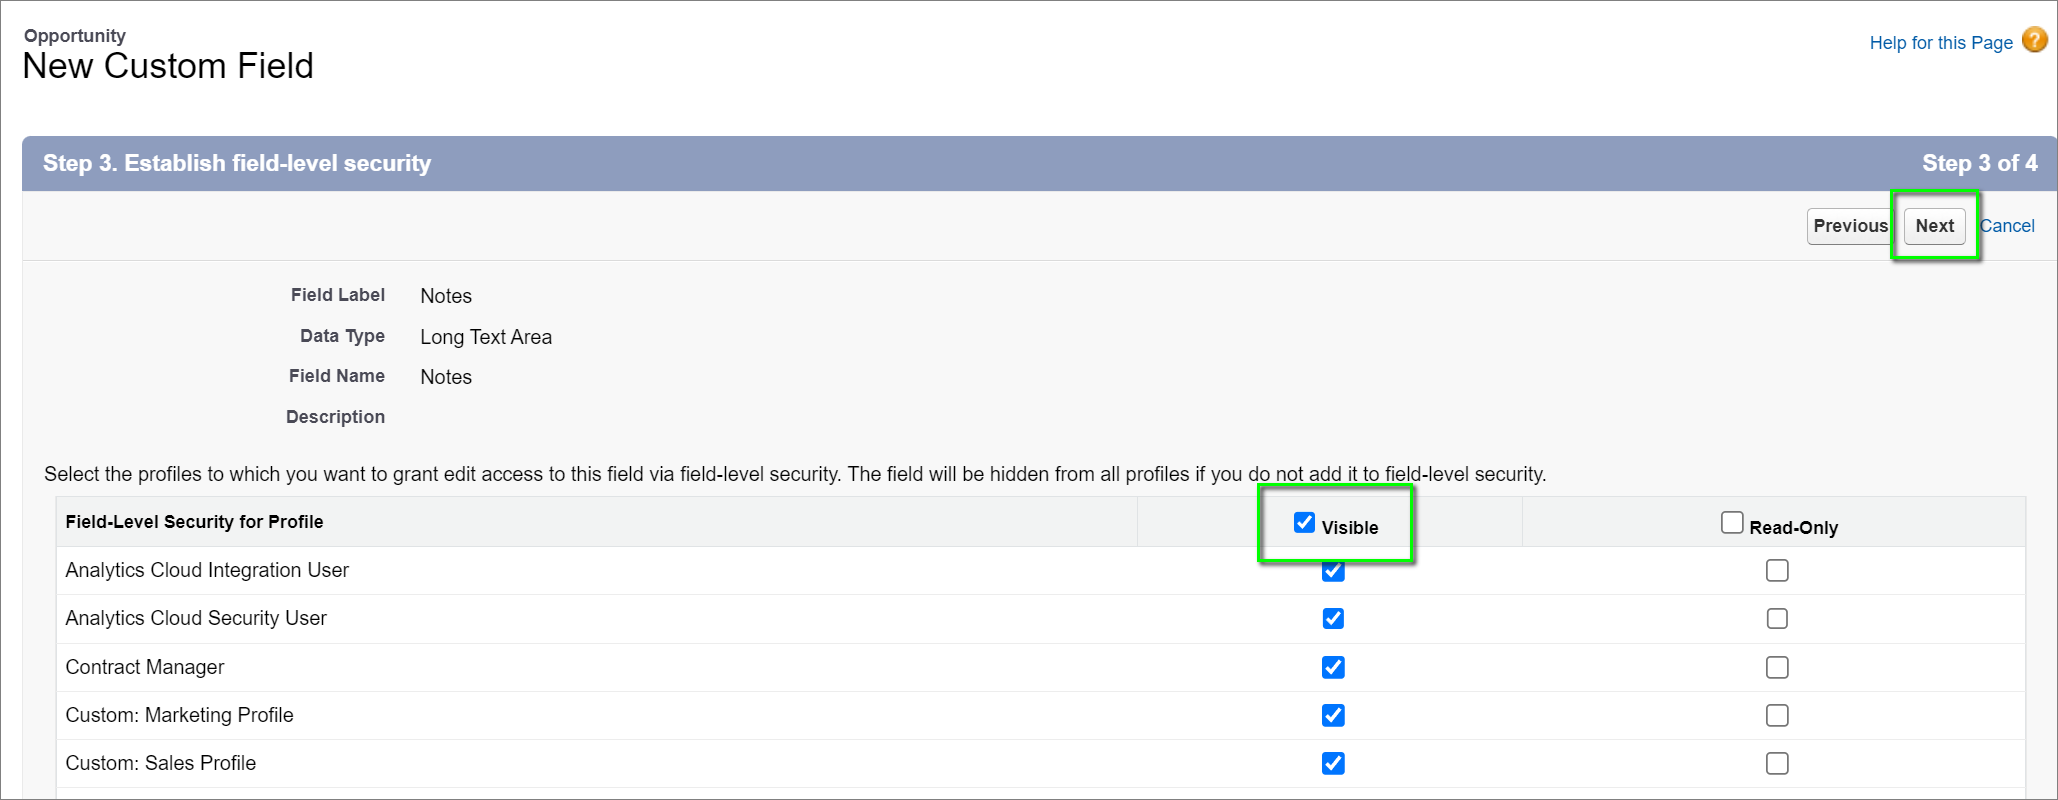
- In Step 3. Establish field-level security:
- Select the user profiles you want to apply this new field to, or just click the Visible box to apply it to all listed user profile types.
- Click Next.
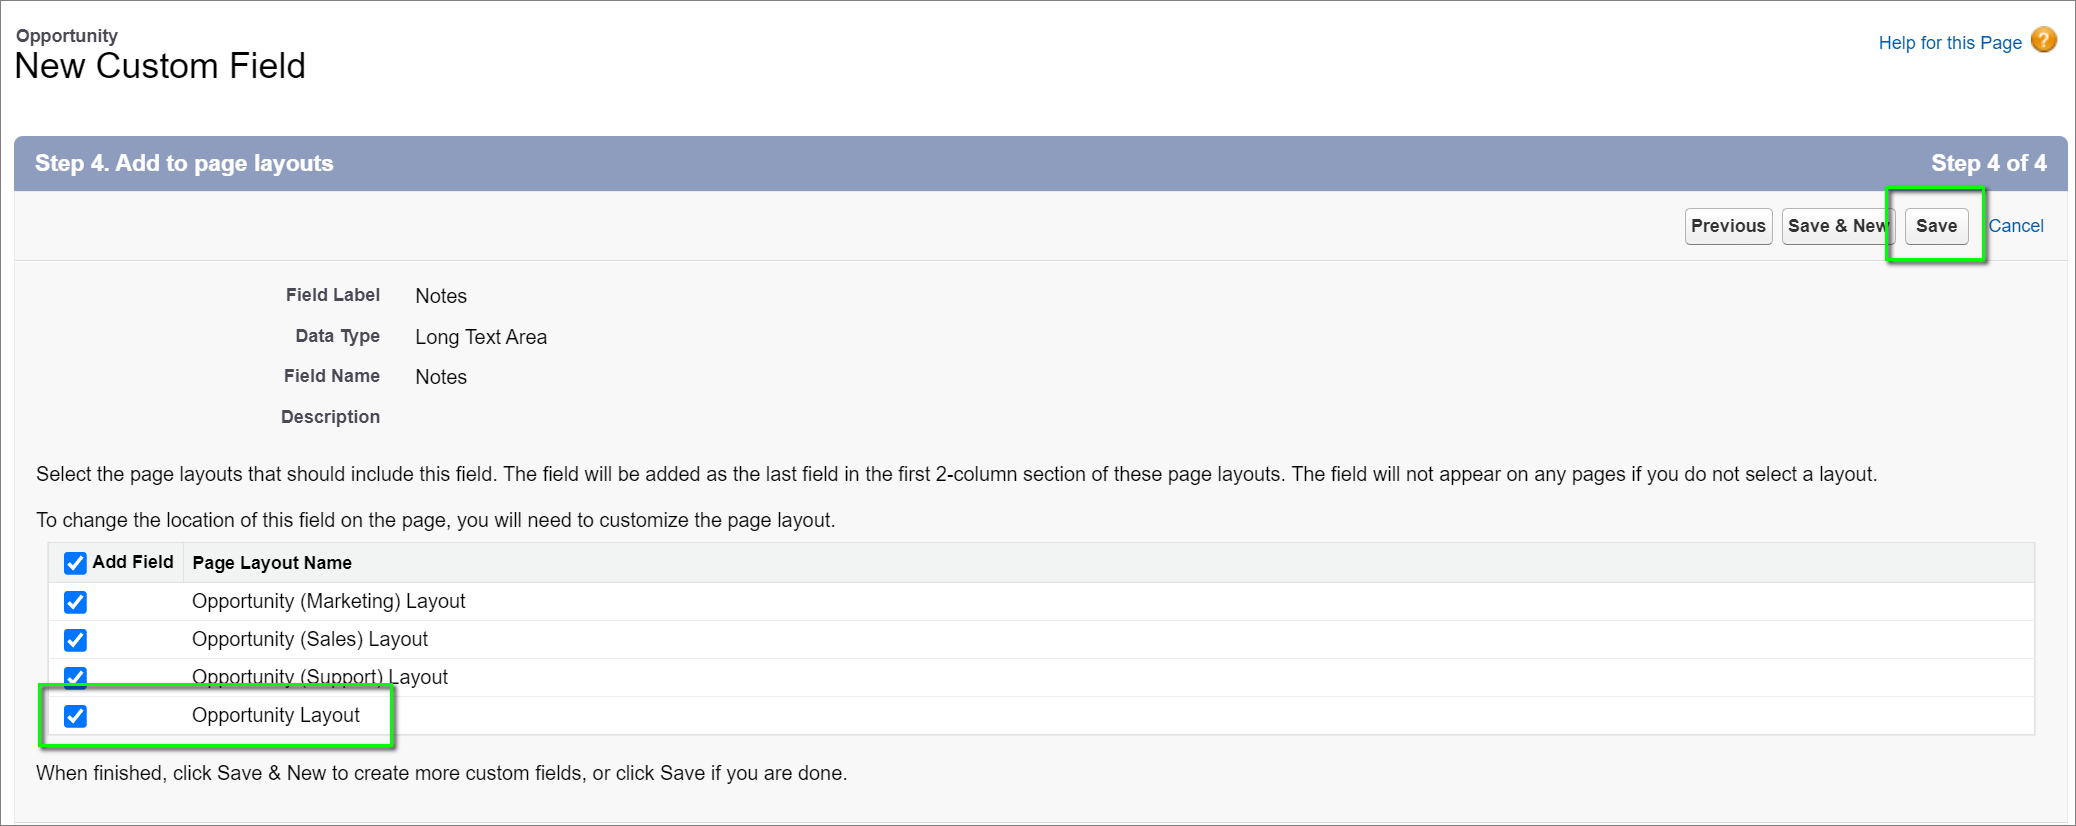
- In Step 4. Add to page layouts:
- Verify that the listed information is correct, and make any changes suited to your Salesforce org. You should not need to make any change unless you don't want to add the new field to specific listed page layouts.
- Click Save to finish adding your two new Opportunity fields.
- In Setup > Object Manager > Opportunity > Fields & Relationships, scroll down and verify that your new fields appear as in the screenshot below:
Edit Your Opportunity Page Layout
Now you'll likely want to add to or position the new fields in your Opportunity Page Layout so that they're visible to the Salesforce user.
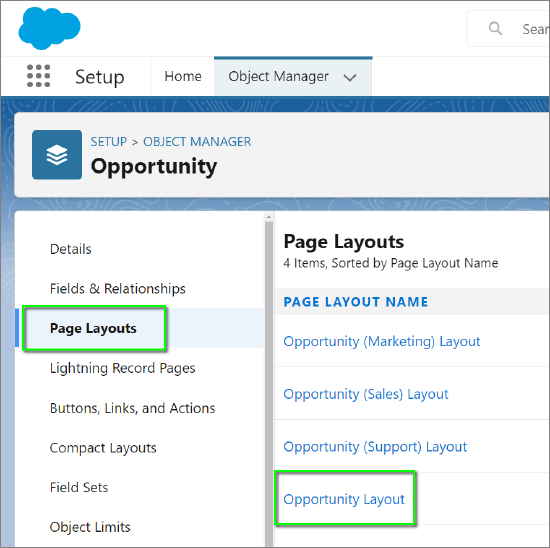
Once again in Salesforce > Setup > Object Manager > Opportunity:
- Click on Page Layouts (this is the same area as you found Fields & Relationships).
- Click on the name of the Opportunity Layout you are changing (Opportunity in this example).
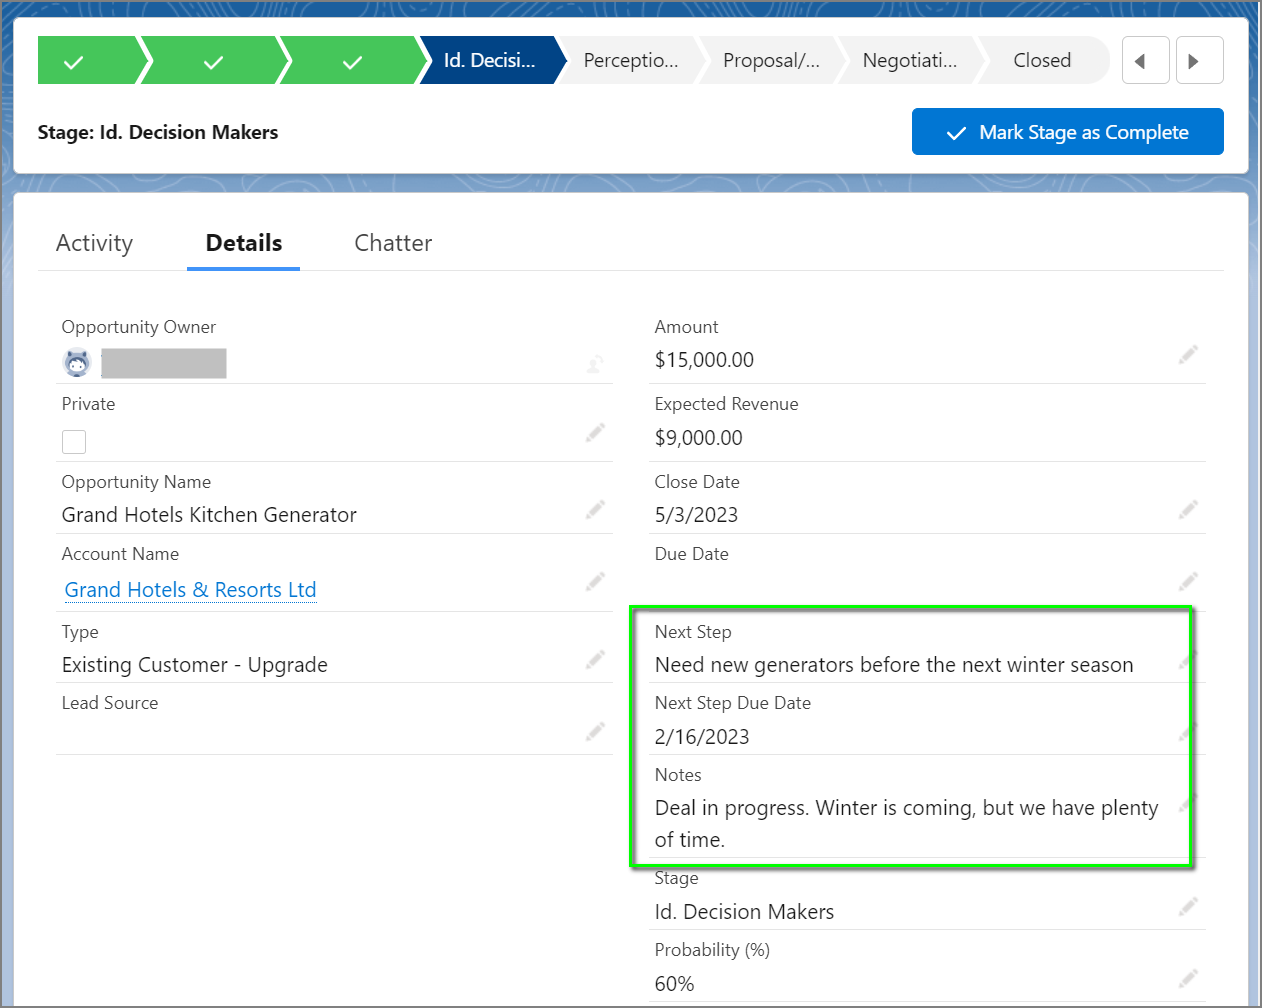
- In the Page Layout, verify that your new fields have been added to the layout from the Opportunity Layout > Fields section. You may need to drag and drop the field labels into a suitable place, depending on your needs. As an example, we've placed them in the Opportunity Information section, near the top of the page.
- Click Save in Opportunity Layout at the top.

- Navigate to an Opportunity in Salesforce, and verify that the new Next Step Due Date and Notes fields are visible to you.
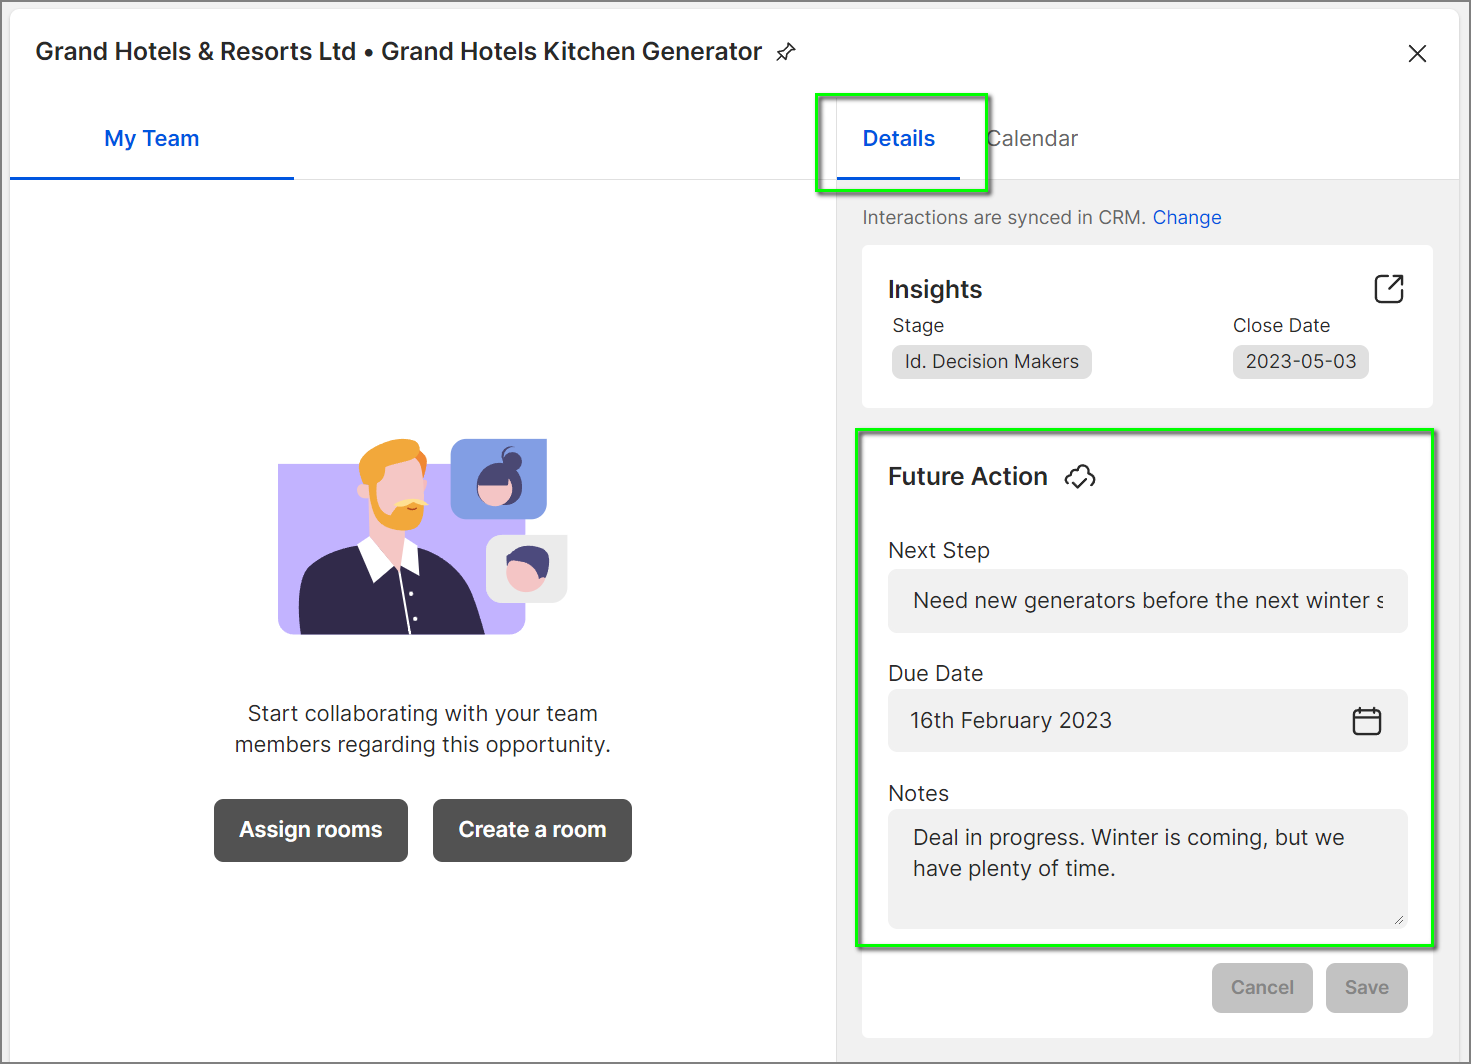
- Return to 8x8 Work and disable and then re-enable Settings > Sales Workspace.
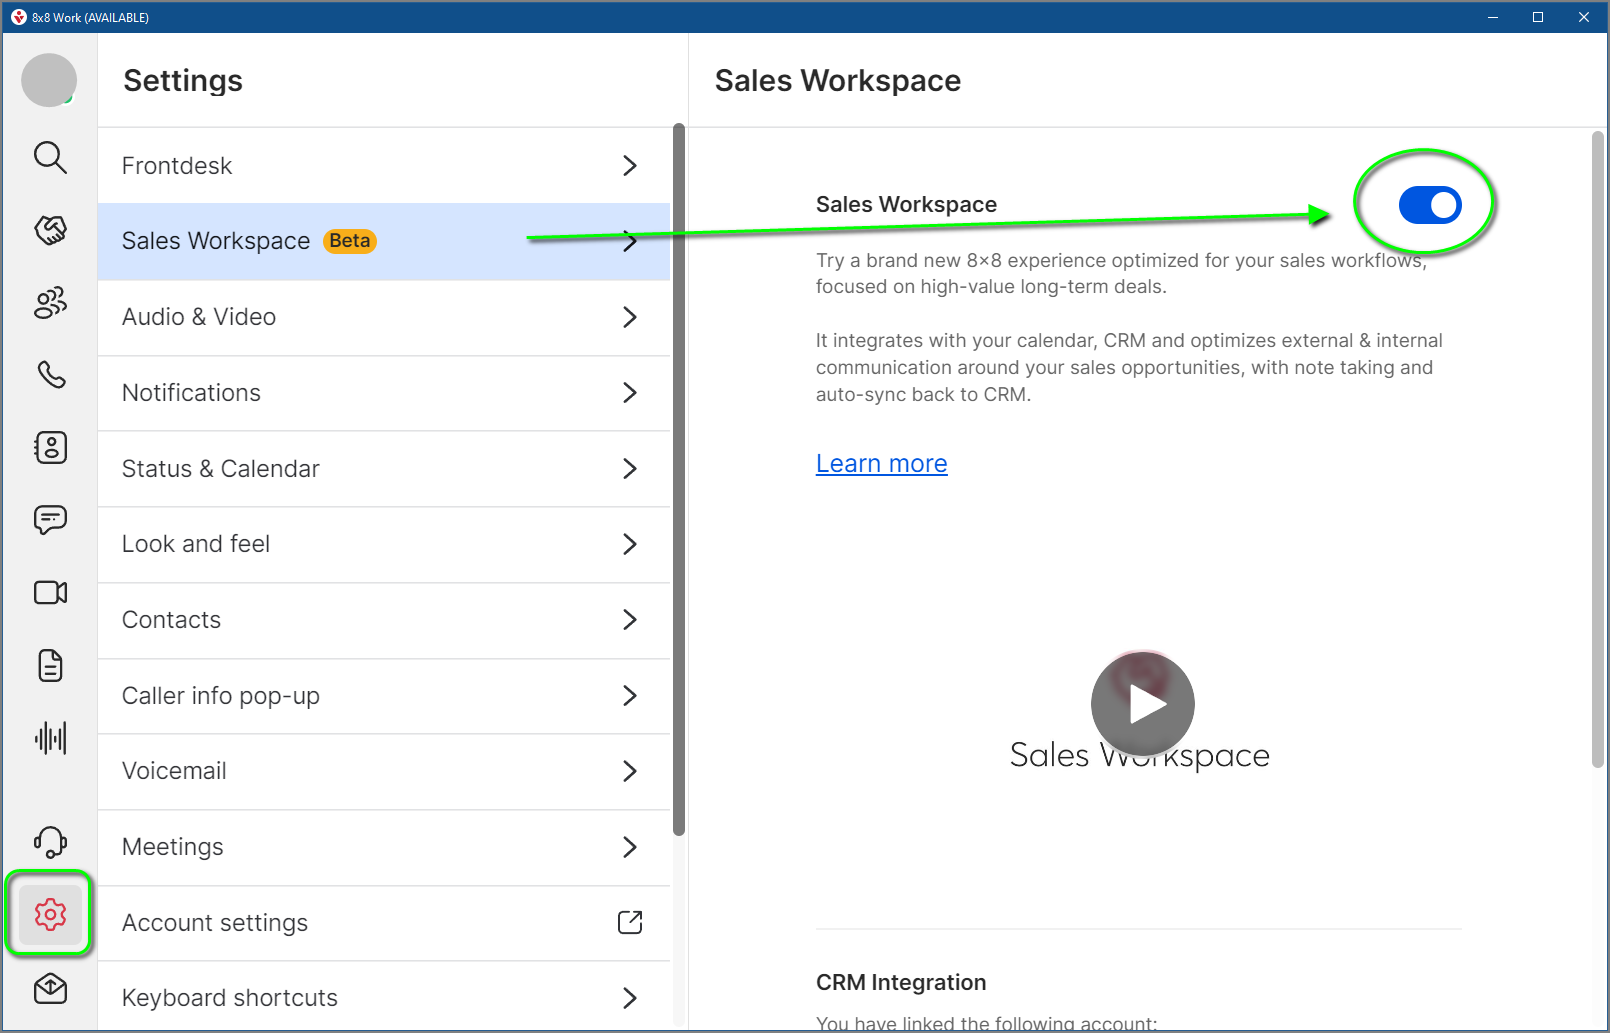
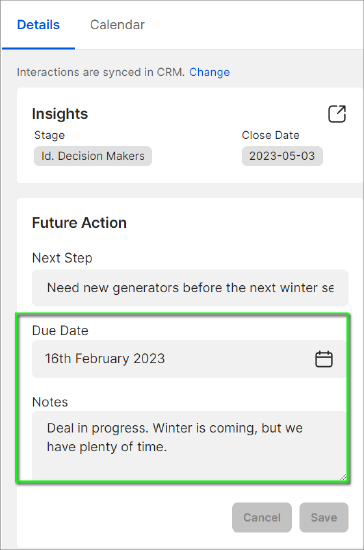
- The Details > Future Action > Due Date and Notes fields should now be editable.
- Due Date will display a calendar when clicked.
- Notes can now be edited.
- When you click Save, changes to any or all of the three items in this Details > Future Action location will be saved into the specific Salesforce Opportunity's Details.