Finding Out What Versions of 8x8 Work Desktop Are Being Used
Objective
Allow admins to find out which versions of 8x8 Work for Desktop their users are using to prepare for Work for Desktop EOL dates.
Applies To
- 8x8 Work for Desktop
Procedure
Note: Only users with X4 Supervisor access to Analytics for 8x8 Work can perform these steps.
- Log in to your 8x8 account.
- Click on the Analytics for 8x8 Work tile on the 8x8 Application Panel. Note: You may have to select a PBX at this point if your company has multiple PBXs.
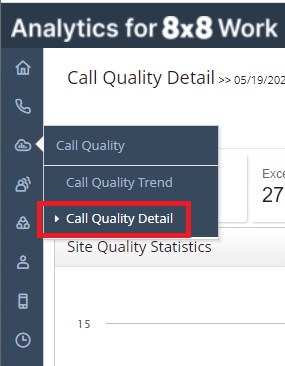
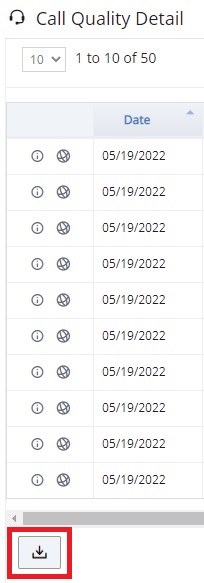
- In Analytics for 8x8 Work choose the Call Quality Detail report.
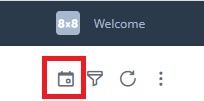
- The default date range for the report is Today but you may want to choose several days to cover all the users using Work for Desktop. To expand the date range click on the calendar icon near the upper right-hand corner of the report.
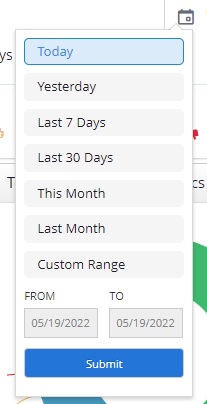
- A set of predefined date ranges will appear along with an option to use a custom date range which you can specify. Select the date range that makes sense for your situation then click on the Submit button at the bottom of the date range selection window.
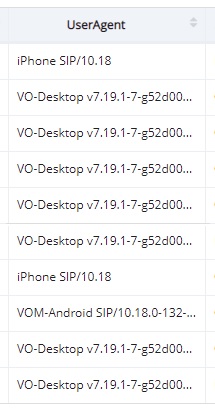
- The report for the new time period will be generated after you hit the Submit button. The devices used for calls are displayed in the UserAgent column. The default location of the column is the 15th column however this may vary depending on how your reports are set up. You can scroll over to the column to check out the values in the column. You'll see it type of device and Work version used on the device if any.

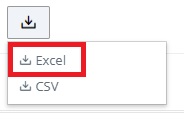
- Although you could scroll through the report to find the desktop versions being used it makes more sense to download an Excel version and use Excel features to find the versions being used. To do this find and click on the download icon at the bottom left of the report.
- Choose to download the Excel version of the report.
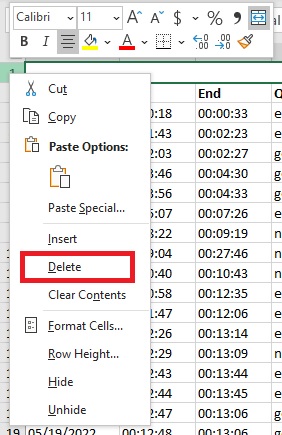
- Open up the report in Excel and then click the title ro Row 1 to select it.

- Left-click on the row number and choose to delete the row.
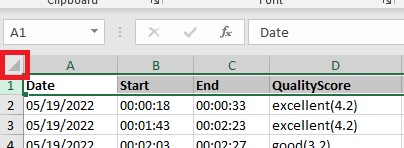
- Click on the empty box at the upper left-hand corner to select the whole report.
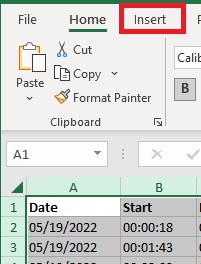
- Click on the Insert tab above the table.
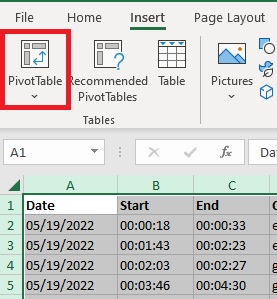
- Click on Pivot Table.
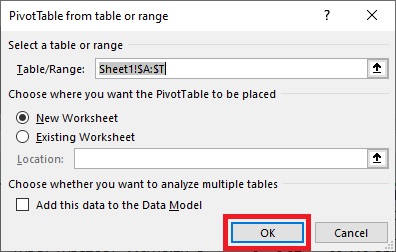
- Click on the OK button in the Create Pivot Table dialogue box.
- A pivot table sheet will appear in your Excel window. On the right you'll see the pivot table controls. Scroll down the list of available column names until you see UserAgent.
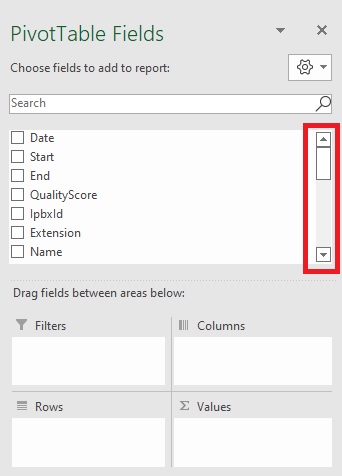
- Once you see UserAgent left click on it and hold the button down, then drag and drop UserAgent into the Rows section of the pivot table control area.
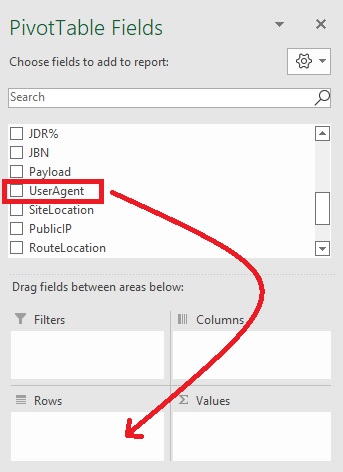
- To the left of the control area you'll see all of the different values for UserAgent come up listed alphabetically.
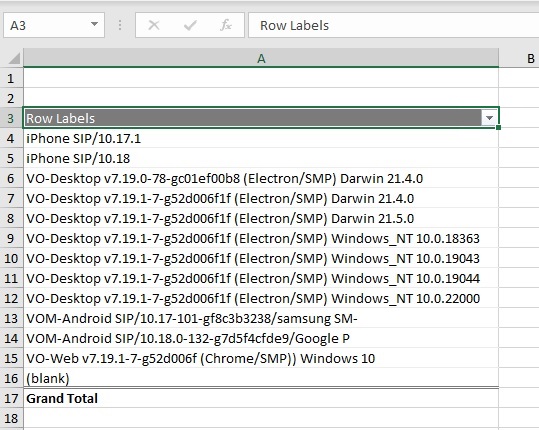
- Your list of values may require you to scroll down to see them all. Any one starting with VO-Desktop is a version of Work for Desktop that was used in the time period you specified. Each value after it is the iOS or Windows version Work for Desktop was running on. Check to see if any of the versions used are coming up for EOL. You can find a list of EOL dates for Work for Desktop here.