Edgemarc (EdgeWater) Router Installing, Upgrading & Configuration
Objective
Set up your Edgemarc (EdgeWater) 200AE1, 250W, or 4550 router for 8x8 service.
Applies To
- 8x8 Work
- Edgemarc 200AE1 Router
- Edgemarc 250 Router
- Edgemarc 4550 Router
- QoS
Procedure
Basic Setup
- Connect your PC or Laptop to LAN port 4 on the 200AE1 router or to LAN port 1 on the 4550 router.
- Connect your router WAN port to an Internet connection.
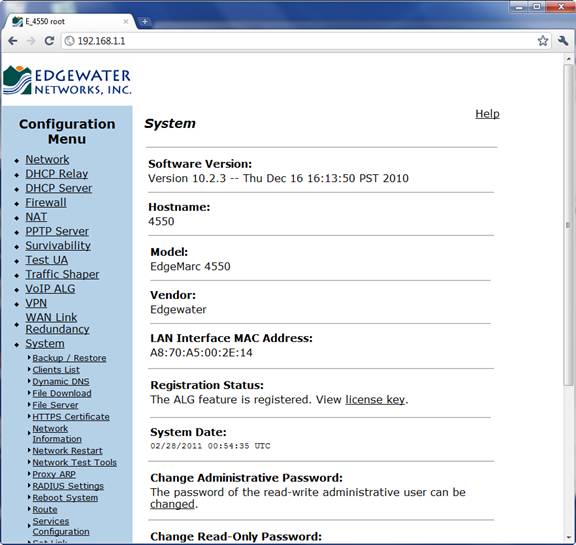
- Open a browser and point it to http://192.168.1.1. The authentication screen appears.

- For Password, type default.
- Click Log In. The System screen appears.
Upgrading the Firmware
Note: The above firmware versions are the latest versions tested and confirmed compatible by 8x8 QA. However, more recent versions are available. While the 8x8 config file should continue to be applicable across all versions and upgrades, please know that 11.6.16 is the latest version tested and supported by 8x8. If you need assistance with firmware files, please create a case with 8x8 Support.
- Under System, click Upgrade Firmware.
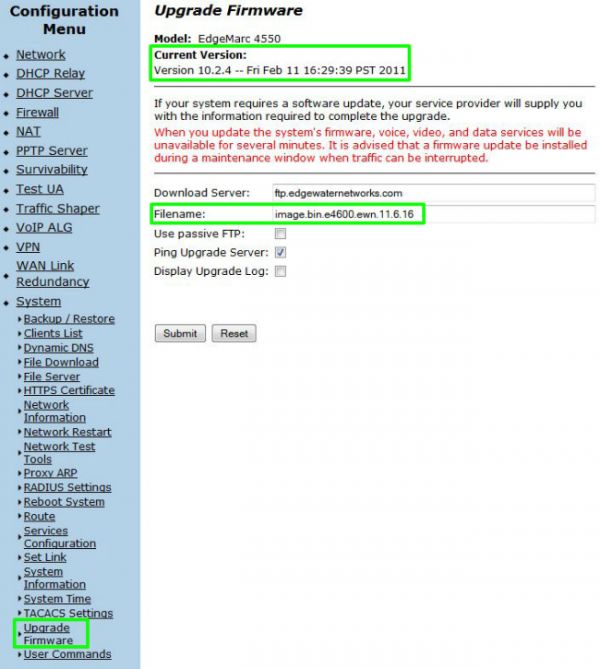
- Note the Current Version of the device firmware.
- Enter the appropriate Filename for your router model:
- EdgeMarc 200: image.bin.e200.ewn.11.6.16
- EdgeMarc 250W: image.bin.e250.ewn.11.6.16
- EdgeMarc 4550: image.bin.e4600.ewn.11.6.16
- Click Submit.
- Compare the new Current Version to the previous one to veify the upgrade.
Note: The above firmware versions are the latest versions tested and confirmed compatible by 8x8 QA. However, more recent versions are available. While the 8x8 config file should continue to be applicable across all versions and upgrades, please know that 11.6.16 is the latest version tested and supported by 8x8. If you need assistance with firmware files, please create a case with 8x8 Support
Loading the 8x8 Default Configuration
Before You Begin
Download the appropriate 8x8 default QoS configuration file below:
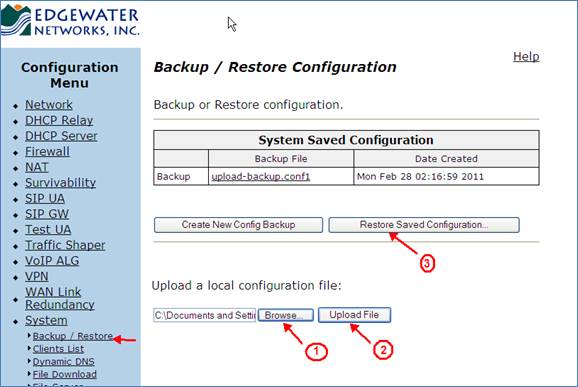
- Under System, click Backup/Restore.
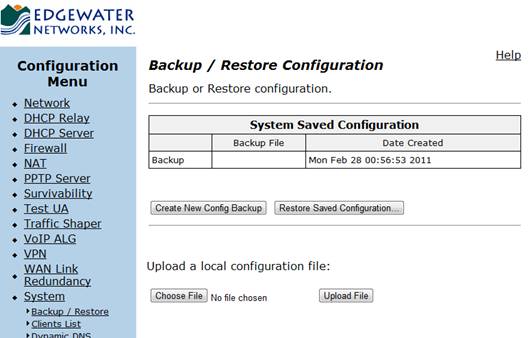
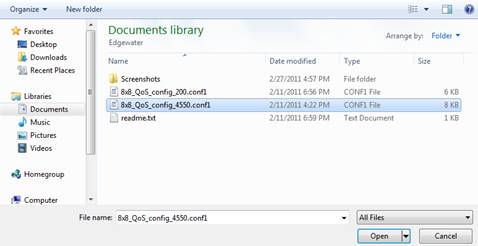
- Click Choose File > Browse to upload the appropriate 8x8 default config file.
- Select the appropriate file.
- On the Backup/Restore screen, click Upload File.
- Click Restore Saved Configuration.
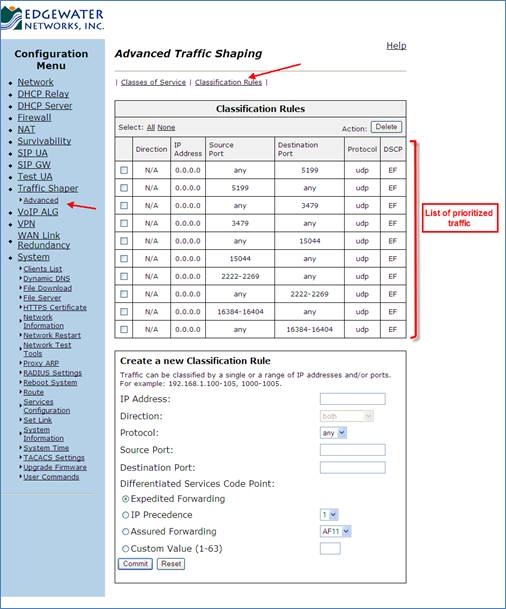
- To verify successful installation, click Traffic Shaper > Advanced > Classification Rules. These 8x8 default values should be present:
Additional Information
For more information, see the X Series Technical Requirements.