How to Provision Your Cisco SPA IP Phone
Objective
To provision your Cisco SPA IP phone for use on 8x8's service.
Applies To
- Cisco SPA IP Phones
- Provisioning
Procedure
The following is valid for Cisco IP phone models SPA303, SPA504G, and SPA525G2.
Notes:
- Accommodation of devices not purchased from or originally provisioned for service by 8x8 is on a commercially reasonable effort basis. These devices are not guaranteed to be supported on 8x8 service.
- Need to provision a Cisco 3PCC phone? Click here
Bringing a previously used Cisco SPA phone over from a different VoIP provider?
Provisioning (enabling it for use) is a snap as long as it has a valid factory-installed device certificate. It's crucial that Cisco phone certificates are factory-installed and not added later. Third-party phones must already have a valid factory-installed device certificate to be used on 8x8 service.
Before You Begin
- Connect the phone to the network and power it on. (If you will be using a computer to complete provisioning setup, ensure the phone and computer are on the same VLAN/subnet.)
- Via the phone menu, verify that the device has a valid factory-installed device certificate.
- SPA303 and SPA504G: Press Menu > 10: Product Info > 6 (Certificate: Installed)
- SPA525G2: Press Menu > 10: Status > 1: Product Info (Certificate: Installed)
- You should see the message Certificate: Installed. If you do not see this, the phone cannot be provisioned for use with 8x8. Please contact the phone's previous owner or the previous service provider for assistance.
- Factory reset the phone.
- SPA303 and SPA504G: Press Menu > 14: Factory Reset
- SPA525G2: Menu > 9: Device Administration > 6: Factory Reset
Enabling/Disabling Web GUI
Ensure the Web GUI is turned on for the SPA phone before accessing the Web GUI through the IP Address.
- Go to Setup.
- Select Settings.
- Scroll down and select Security Configuration.
- If there is a locked padlock at the top of the screen, press Star, Star, Pound on the keypad to unlock the settings so that they can be edited.
- Select Web Access Enabled and press Edit.
- Press Y/N.
- Select Save.
Using the Web GUI
Note: Ensure the phone and computer are on the same VLAN/subnet to complete the following steps.
- Find and note the phone's IP address.
- SPA303 and SPA504G: Press Menu > 9: Network.
- SPA525G2: Press Menu > 10: Status > 2: Network Status.
- On a computer on the same network as the phone, enter the phone's IP address.
- Log in to the web GUI and point the endpoint to 8x8's configuration server:
- Admin Login > Advanced > Provisioning > Configuration Profile
- Profile Rule: https://lscfg.8x8.com/linksys/custom.cfg
- Profile Rule B: https://lscfg.8x8.com/linksys/$MA.cfg

- Admin Login > Advanced > Provisioning > Configuration Profile
- Click Submit All Changes. (Phone should reset.)
- Once the phone boots back up, manually reboot the phone again.
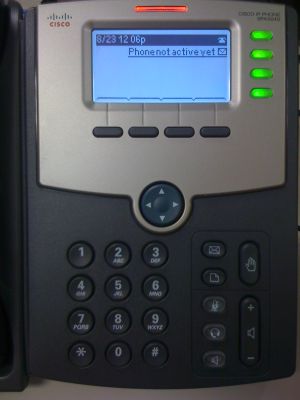
- Following the manual reboot, wait 30 seconds. The phone will reboot again on its own. It should display Phone not active yet.
- Activate your phone using the activation code provided in your welcome email.
Using the Hard Phone
- Press Menu > Device Administration > Profile Rule.
- Enter the Profile Rule: https://lscfg.8x8.com/linksys/custom.cfg
- Press Sync.
- When sync is complete, power-cycle the phone. Wait until it finishes Refreshing voice component. The device should update to correct date and time.
- Press Menu > Device Administration > Profile Rule (should be blank again).
- Enter Profile Rule B: https://lscfg.8x8.com/linksys/$MA.cfg
- Press Sync and wait for the Refreshing voice component to complete. The device should get an extension number and come online.
Additional Information