Fuze Connect for NetSuite User Guide
Overview
Fuze Connect is a desktop application which automatically looks up NetSuite data during a call, to give you the information you need about the caller at a glance.
Getting Started
Fuze Connect is offered as a desktop application. To install Fuze Connect on your computer, you can download the executable from Fuze servers.
- Open your web browser and navigate to the Fuze Connect download link: https://fuzeconnect.gts.fuze.com/.
- Your browser should automatically download the Mac or Windows installer that is specific to your platform.
- Open the downloaded Fuze Connect installer, and follow the installation instructions.
Initial Setup
Perform the following actions to set up Fuze Connect with NetSuite:
- Once the installation is complete, you may start Fuze Connect.
- On the first run, you will need to log in to your Fuze account.
- From the login screen, enter your Fuze Username and click Next.
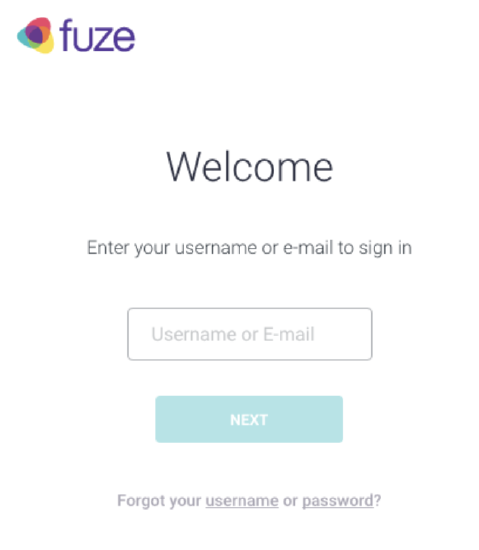
- Depending on your account settings, you will either be prompted for your Fuze Password, or redirected to your authentication provider to complete your login.
Authorizing NetSuite
Once you log in with your Fuze account, additional authentication will be required to complete the connection between Fuze and NetSuite.
If you receive the following message, you must authorize your connected NetSuite integration before you can use Fuze Connect.
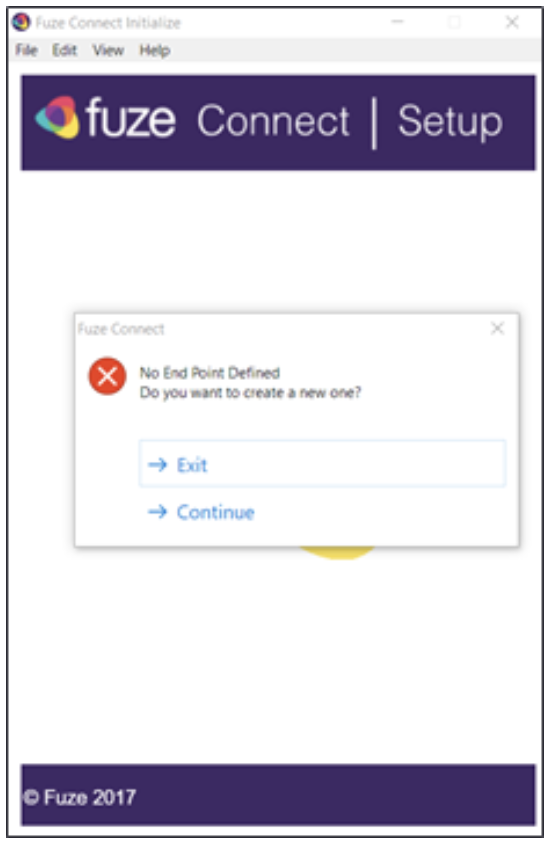
- Click Continue to proceed to the next prompt.
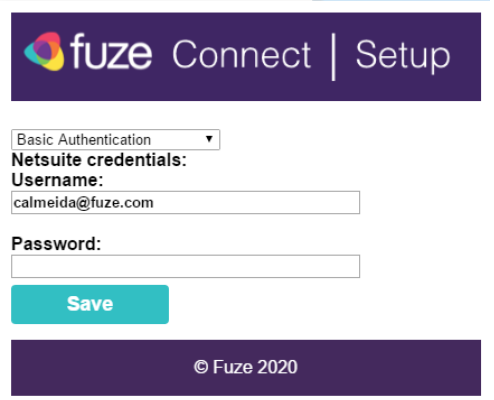
- Enter your NetSuite username and password to authenticate your credentials and click Save.
- This option may not be available if this integration method was not deployed.
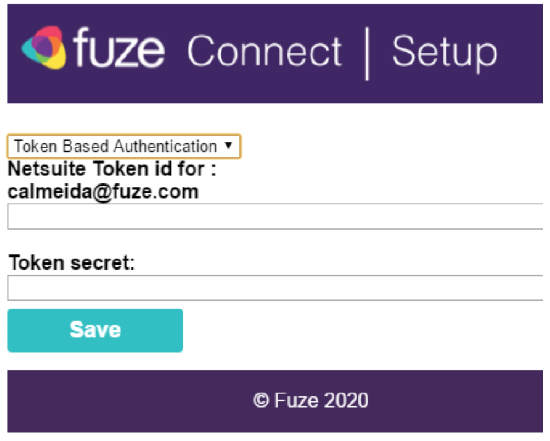
- You can also change the authentication method to Token Based to authenticate using a token id and a token secret. Click Save to proceed.
- This option may not be available if this integration method was not deployed.
- This option may not be available if this integration method was not deployed.
Once Fuze Connect has been authorized with your NetSuite instance, you can begin using Fuze Connect right away.
Application Start
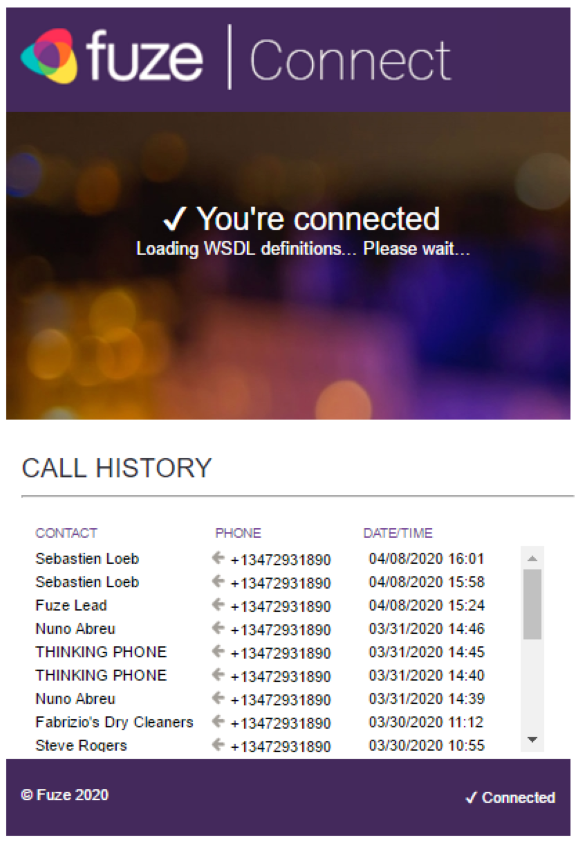
At the start of the application, Fuze Connect fetches the NetSuite WSDL definition to have access to the NetSuite web services. During that process, you should see a message regarding the WSDL definitions being loaded.
If you initiate/receive a call during this process, it may take more time to get the results since the queries are only going to be performed after we load the WSDL.
Idle Screen
When you are not on a call, Fuze Connect will display the following idle screen.
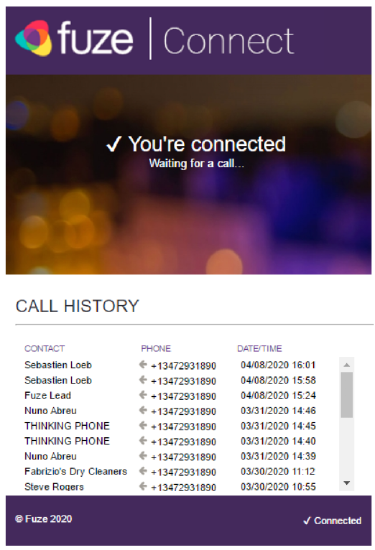
The idle screen shows the connection status of Fuze Connect. Below the status text and image is the call history, which shows all calls made or received while Fuze Connect was open and active.
- A left arrow indicates an inbound call.
- A right arrow indicates an outbound call.
Clicking a record in the call history will dial that contact at the number shown.
Calls initiated in this way will be made using your preferred click to call device, as configured in the Fuze Customer Portal.
Inbound / Outbound Calls
On an incoming or outgoing call, the connector will present relevant information by performing a lookup in your connected NetSuite environment based on the caller’s phone number and Caller ID.
Once the lookup is complete, a table will be displayed showing relevant data.
Fuze Connect will attempt to match the phone number to contact/accounts in the connected NetSuite environment.
Matched entities will be displayed in the primary area. When there is a match, the integration will display related opportunities when available.
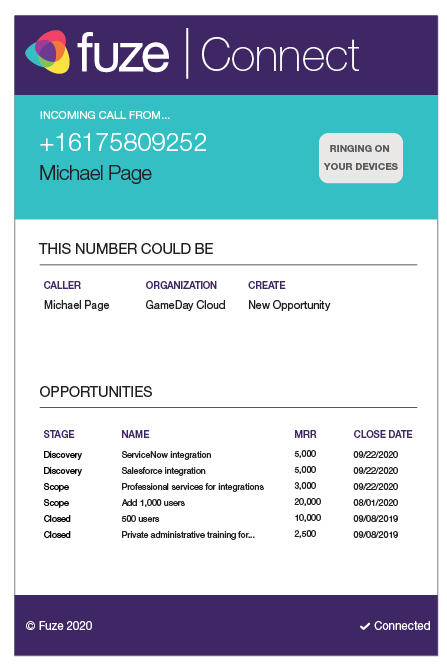
The following actions can be performed on the associated data in Fuze Connect while on a call:
- Click the caller's name to open that contact in your connected NetSuite.
- Click the opportunity listing to automatically open that record in your connected NetSuite.
- Click the New Opportunity link to create a new opportunity associated with the account, and open it in a new window in NetSuite.
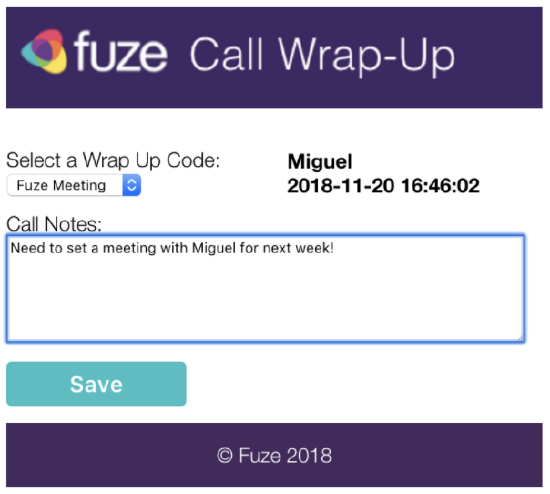
Call Notes and Wrap-Up
When the call ends, a Notes window will be opened. It will allow the user to be able to add call notes related to the contact/lead/account of the call and select a wrap-up code. If an opportunity or a new opportunity link is clicked, then the phone call entry is also associated with that opportunity.
Call notes will also include a link to the associated call recording link.
Call recordings are stored on the Fuze platform for a defined amount of time, which is currently 60 days. If a user clicks on a call link for a call that is older than this defined time, they will receive an error or notification that the link is expired.