Meeting History and Accessing Recordings
Objective
Viewing meeting history and accessing meeting recordings in Fuze Desktop.
Applies To
- Fuze Desktop
- Meetings
- Recordings
Procedure
Your meeting and webinar details, including meeting IDs and notes, are saved automatically for you to view and access whenever you need them.
Expand a section below to view details about accessing and sharing meeting recordings.
The Meetings Tab on the Search Screen
Your full meetings and webinar history is available on the Meetings tab of the Search screen.
Access the Meetings tab on the Search screen one of the following ways:
- Click in the Search bar in the Fuze toolbar, and then click the Meetings tab.
- Click Meetings on the Fuze toolbar, and then click Meeting List in the menu.
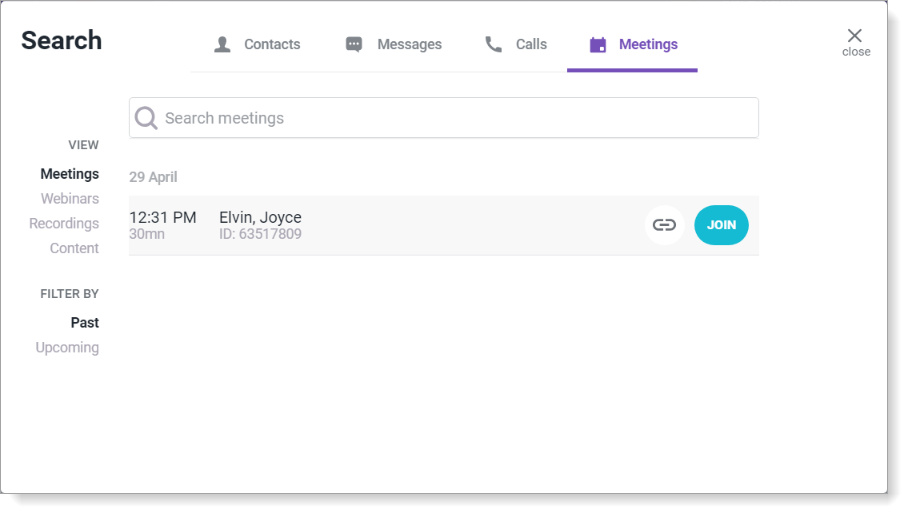
Use the Filter By menu to show Upcoming or Past meetings (if Fuze is connected to your calendar). Past meetings are displayed by default.
If you point to a previous meeting, the following options are available depending on the type of contact:
 |
Join the meeting. This feature is helpful if you want to access notes or other content that was shared during the meeting. |
|
|
Copy a link to the meeting. You can send the link to another person if you wish to rejoin the meeting with them. |

Accessing Meeting and Webinar Recordings
Meeting hosts can access recordings of meetings and webinars from the Search screen.
- Click the Search bar in the Fuze toolbar.
The Search screen is displayed. - Click Meetings to open the Meetings tab.

- Click Recordings in the View menu.
A list of your recordings is displayed.
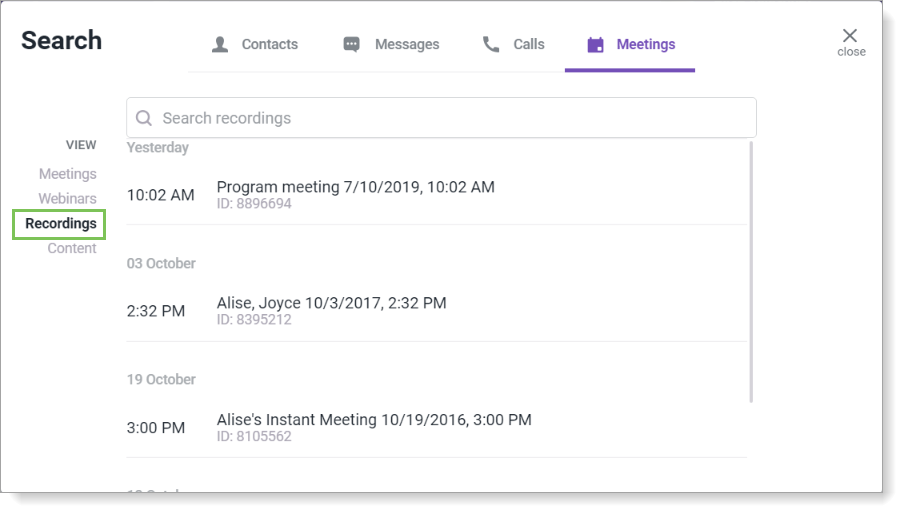
- If the meeting recording that you want to access was not recorded recently, use Search recordings to search for the meeting recording by meeting name.
- Point to the recording.
The recording options are displayed.

- Click on the recording to configure Sharing options. When available, click the Delete, Share, or Download button to perform an action.
Sharing a Recording with Email
Fuze allows you to email recordings to contacts with optional security measures such as password protection and recording access expiration.
- Click the Search bar in the Fuze toolbar.
The Search screen is displayed. - Click Meetings to open the Meetings tab.
- Click Recordings in the View menu.
A list of your recordings is displayed. - If the meeting recording that you want to access was not recorded recently, use Search recordings to search for the meeting recording by meeting name.
- Click on the recording that you want to share, or click the Share icon.

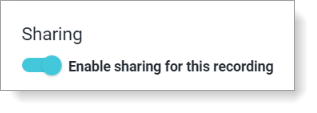
The Sharing screen is displayed. - Click Enable sharing for this recording.
- (Optional) To set an expiration date on the recording availability:
In Link expires after in the Advanced options area, select a date when you want access to the recording to expire.
You can manually enter a date, use the scroll wheel to select a date, or click the down arrow to open the calendar to select a date. - (Optional) To require a password:
- Click Require password.
- Click on the line beside Require password and enter a password. There are no password requirements.
- In the Invite area:
- Use Search people to search for contacts to whom you want to grant recording access. Click the contact name in the search results to add them as an invitee.
- Click Send custom message to invitees and enter a message in the field below.
- Click Save.
An email with a link to the recording is sent to the invitees.
Sharing a Recording Link
Fuze allows you to send links to recordings to contacts with optional security measures such as password protection and recording access expiration.
- Click the Search bar in the Fuze toolbar.
The Search screen is displayed. - Click Meetings to open the Meetings tab.
- Click Recordings in the View menu.
A list of your recordings is displayed. - If the meeting recording that you want to access was not recorded recently, use Search recordings to search for the meeting recording by meeting name.
- Click on the recording that you want to share, or click the Share icon.
The Sharing screen is displayed. - Click Enable sharing for this recording.
- (Optional) To set an expiration date on the recording availability:
In Link expires after in the Advanced options area, select a date when you want access to the recording to expire.
You can manually enter a date, use the scroll wheel to select a date, or click the down arrow to open the calendar to select a date. - (Optional) To require a password:
- Click Require password.
- Click on the line beside Require password and enter a password. There are no password requirements.
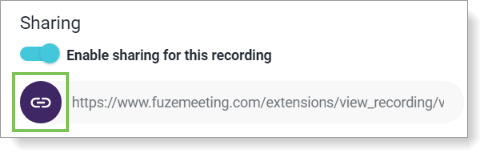
- Click Save.
- Click the link icon in the Sharing area and send the link to contacts by chat, email or any other method.