Fuze Web Microphone Checklist for Google Chrome
Objective
Ensuring that your Google Chrome browser is configured to allow access to your device's microphone.
Applies To
- Fuze Web
- Google Chrome
Procedure
To make or receive calls in Fuze Web with Google Chrome, you will need to ensure that your browser is configured to allow access to your device's microphone. If access is blocked, outgoing calls will fail, and the answer button will not be responsive. This is to prevent calls from being connected with one party unable to speak, which is also known as one-way audio.
When logging into Fuze Web for the first time, you may see a camera icon with a red X in Chrome’s location bar as shown below. It indicates Chrome does not have access to the camera and/or microphone for web.fuze.com. It is a security feature built-into Chrome to prevent unwanted access from web sites.

Granting Chrome Access to Your Camera or Microphone
Follow the steps below to allow Chrome access to your camera/microphone:
- Click the red X icon in the Chrome browser bar.
- From the window that appears, select Always Allow.
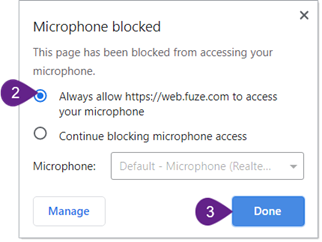
- Click Done to register your changes.
Confirming Your Camera/Microphone Has Access
Once access has been granted, you can confirm the correct audio device is selected and working properly.
- Navigate to your Fuze profile menu and click Settings.
- Click Audio/Video on the left hand side of the Settings screen.
- Your audio and video settings are displayed. Click TEST, next to the device selection drop-down menu. An audio chime will be played through the selected headset.
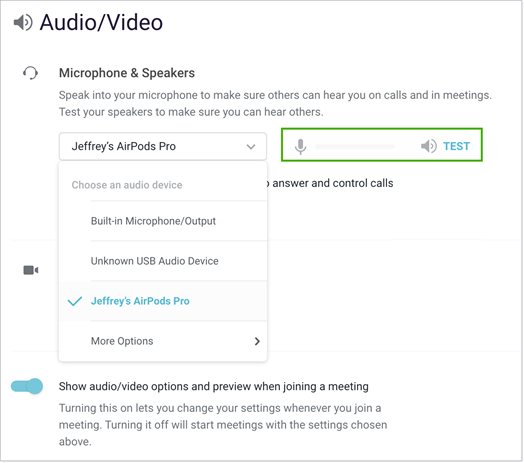
- Speak into your microphone and confirm the microphone is receiving your voice using the green sound level bar. The indicator should rise and fall as you speak.
Configuring Windows 10 Privacy Settings
If your microphone is still not working, please ensure Windows 10 privacy settings are not preventing access.
- Click the Start button.
- Type privacy in the Windows search bar.
- From the search results, select Privacy settings. The Settings window appears.
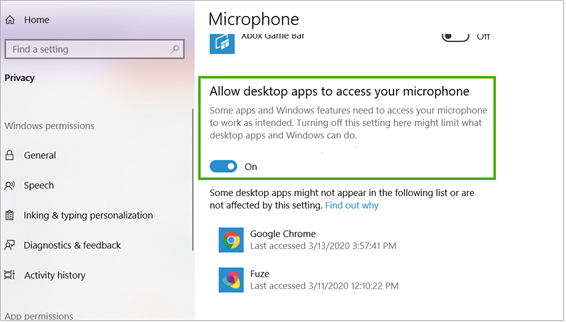
- Within the App permissions section on the left hand side, click Microphone.
- Scroll through the window on the right side of the page, and locate the setting for Allow desktop apps to access your microphone. Ensure the setting is turned On.
- Close the window.
Sound Settings in Windows
If the issue still persists, you may test the microphone/speaker functionality through Windows settings.
- Click the Start button.
- Type sound in the Windows search bar.
- From the search results, select Sound settings. The Settings window appears.
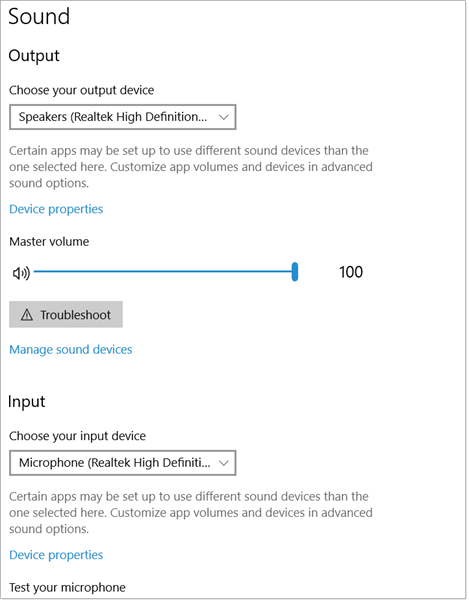
You will be able to set your default devices and ensure they are working properly.