Fuze Discover Dashboards
Objective
Using Fuze Discover Dashboards.
Applies To
- Fuze Discover
Procedure
In Fuze Discover, you can make non-permanent changes to dashboards, including filtering the data or changing a time zone. As long as you do not save your changes, your actions do not impact other users.
Fuze Discover is accessible within the same user interface as Fuze View. Any user enabled with a Fuze Discover license can access the tool by clicking Start Exploring or by visiting https://data.fuze.com/discover.
Expand a section below to view detailed information about the Fuze Discover dashboard.
Dashboard Introduction
A dashboard is a collection of visualizations, text, and queries that are displayed like tiles together on one screen.
Dashboards can consist of tiles based on text, saved Looks, or queries specific to that dashboard.
To learn more about creating and managing your own dashboard, see Fuze Discover Overview.
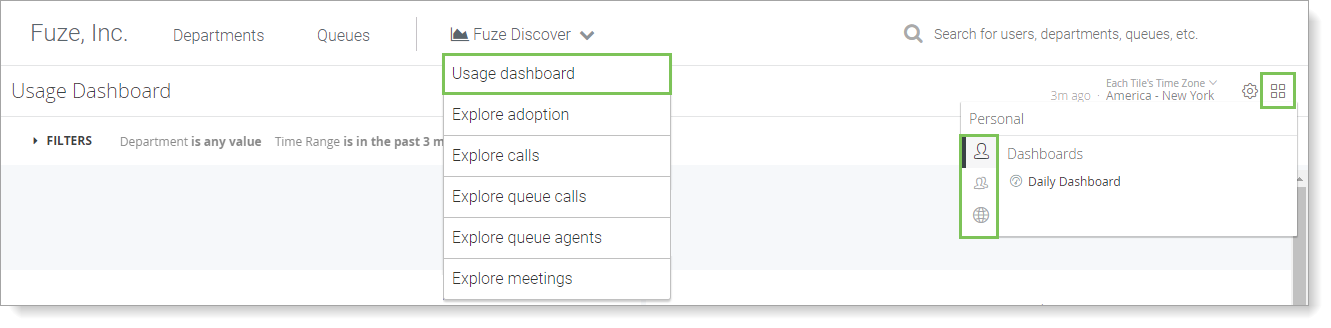
Opening a Saved Dashboard
To open a saved dashboard, click the Fuze Discover menu at the top of the screen and select one of the prebuilt dashboards. Additionally, access saved dashboards from the Personal, Group, or Shared tabs in the Discover menu.
Making Temporary Changes to a Dashboard
If you do not save your changes, you can make some temporary changes to a dashboard without affecting anyone else, such as changing the time zone. If your dashboard has filters, you can also change the filter values to restrict the dashboard to certain types of data.
To save these changes for other users, see Looks.
Changing Dashboard Filter Values
Discover dashboards often have one or more filters that affect the data that is displayed in one or more of the tiles. You can change a filter to see how the data changes. Any changes you make to Filters do not affect anyone else that uses the dashboard unless you edit and save the changes.
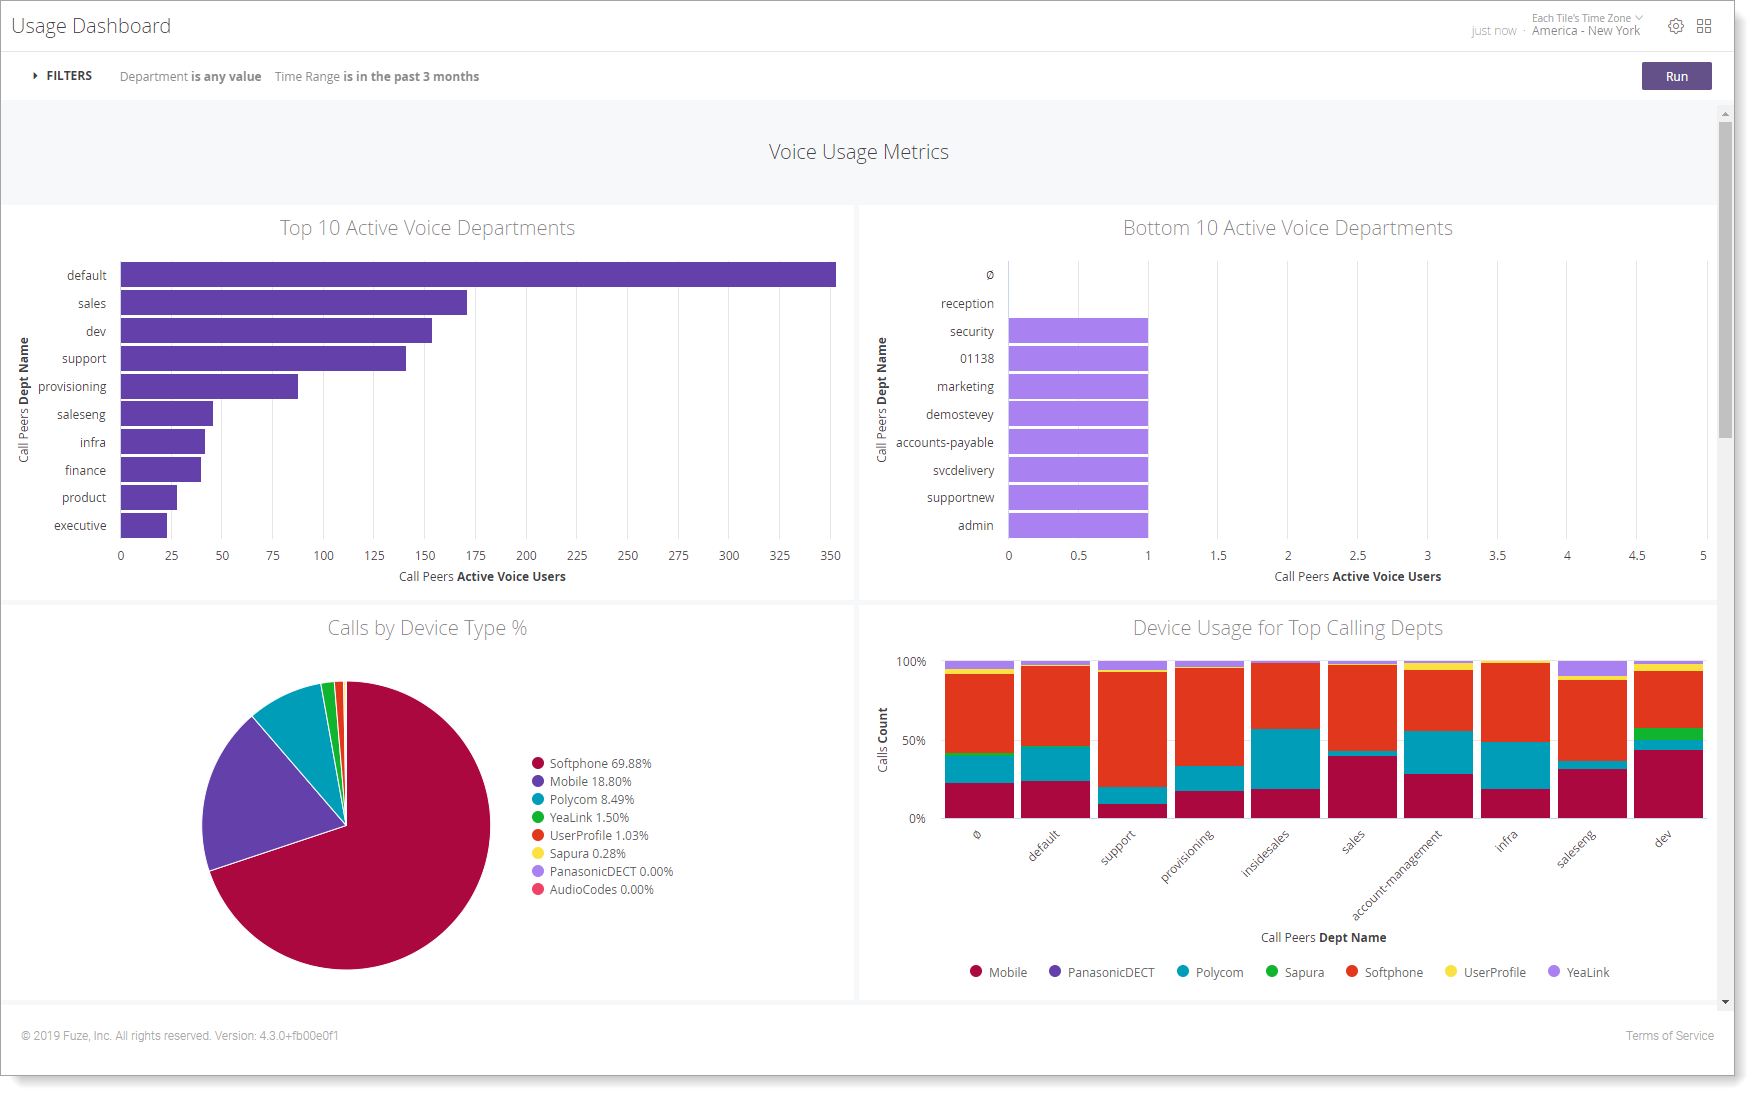
For example, the Usage Dashboard has Department and Time Range filters. Department specifies which department’s data is displayed in the dashboard, and Time Range specifies the dates that the data reflect. Click Filters to expand the section and view and edit the Department and Time Range filters.
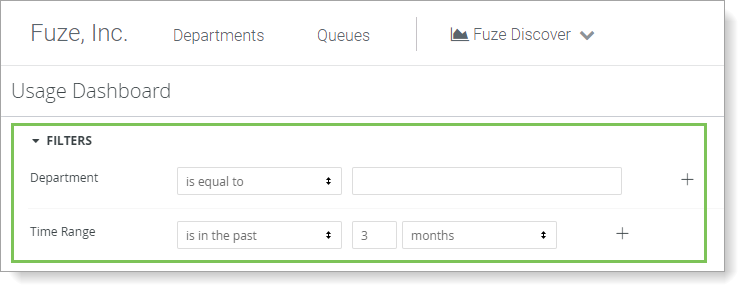
If the far-right box is empty for a filter, that filter is not applied.
Configuring a Dashboard Time Zone
If your administrator enabled the User Specific Time Zone setting, you can use the time zone drop-down menu to specify the time zone where the dashboard is located.

Choose one of the following options:
- Each Tile’s Time Zone to have all tiles run in the time zone in which they were saved.
- Viewer Time Zone to have all tiles run in your user’s dashboard setting.
- One of the time zones listed in the drop-down to have all tiles run in that time zone.
Scheduling Dashboard Data Delivery
Discover lets you schedule periodic delivery of your dashboard to email recipients or to other data destinations.
Sending Your Dashboard
Discover lets you send a dashboard immediately in an email to yourself or other people, or send the results to another data destination. See the Sending Data Now documentation page for details.
Downloading Your Dashboard
Discover lets you download your dashboard so that you can store or share the current data. You can download the dashboard as a zipped collection of CSV files or as a PDF.
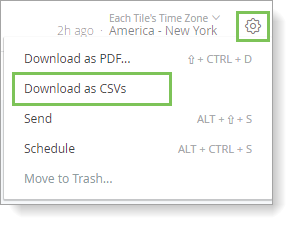
Downloading Your Dashboard as CSV Files
- Click the gear icon in the top-right corner of the screen.
- Select Download as CSVs to begin the download.
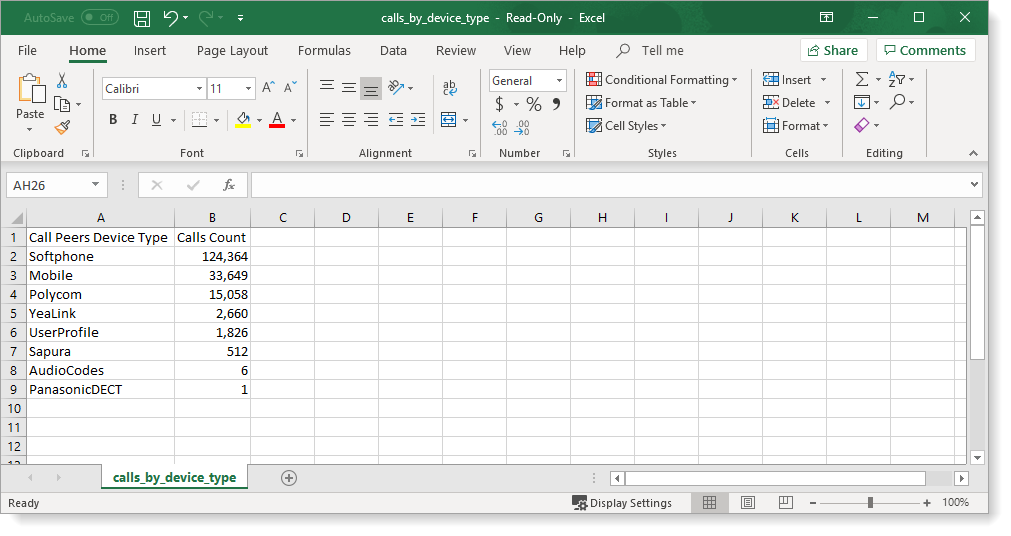
The zipped folder contains a separate CSV file for each dashboard tile. Each CSV file includes the formatted data used to create the tile in the dashboard. For example, the Calls by Device Type dashboard outputs the following CSV file.
Downloading Your Dashboard as a PDF
If your Discover administrator gave you download permissions, you can also download your dashboard in PDF format.
If some features are not available, contact your IT administrator and ask about installing Chromium.
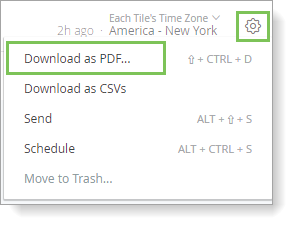
- Click the gear icon in the top-right corner of the screen.
- Select Download as PDF. The Download window is displayed.
- (Optional) In Filename, enter a new file name.
- (Optional) Expand Advanced options and customize your PDF.
- Single column format: When selected, the PDF displays the dashboard tiles in a single vertical column.
- Expand tables: When selected, any tiles that use the table visualization display all the information in the table even if the table size is larger than the allocated size for each tile in the PDF.
- Paper size: Select the paper size that best displays your dashboard. Large visualizations or groups of overlapping dashboard tiles may require resizing to cleanly fit on the PDF page.
- Click Download.
Downloading Data from Dashboard Tiles
To download the data from a specific tile, click the vertical ellipsis and select Download Data.

You cannot download the data for dashboard tiles based on merged results queries, but you can download the dashboard as a PDF or as a collection of CSV files.
Exploring the Data Used in a Dashboard
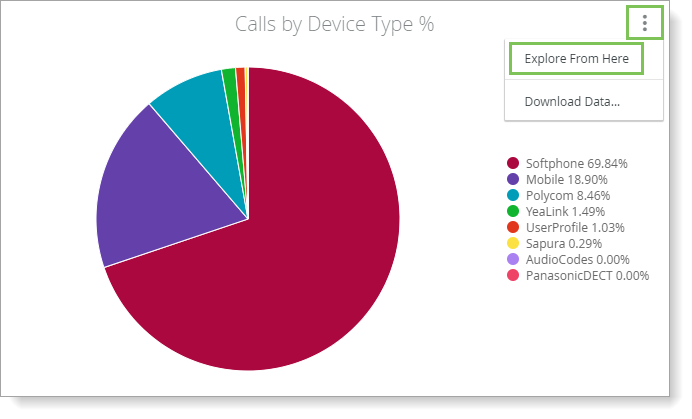
Dashboards are also starting points for further exploration. If you have the appropriate permissions, you can click the title of a tile to open an Explore to manipulate the tile’s underlying data, or you can select Explore From Here from the tile’s menu.
On the Explore page, you can continue to adjust the query to fit your particular needs.
You also can click or hover on some elements in the dashboard tiles (such as a slice of a pie chart) to view more details about the data. You can learn the skills to explore the details of a dashboard’s data on the exploring data pages.
Cancelling Delivery of Scheduled Reports in Your Dashboard
- Click the gear icon in the top-right corner of the screen.
- Click Schedule to view all scheduled reports.
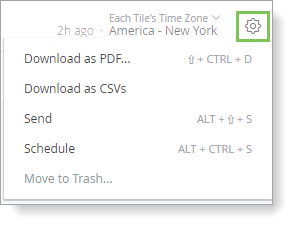
- A list of scheduled reports is displayed in the Schedules section. Select the report whose delivery you would like to stop, and click the X icon next to it.
- Click Save All to register your changes.