Using Audio & Video Settings
Objective
Setting audio and video preferences in Fuze Desktop.
Applies To
- Audio Settings
- Video Settings
- Fuze Desktop
Procedure
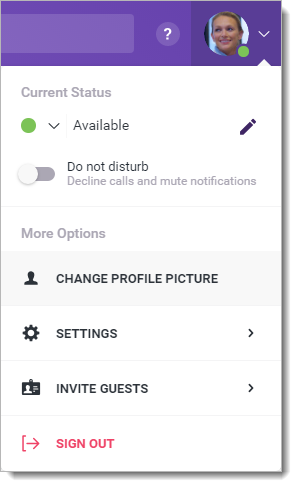
From your profile menu, navigate to the Settings page.
Use the Audio/Video section to configure, test, and set your default camera and audio devices that Fuze Desktop uses for calls and video meetings.
Click ESC to exit and save your changes at any time.
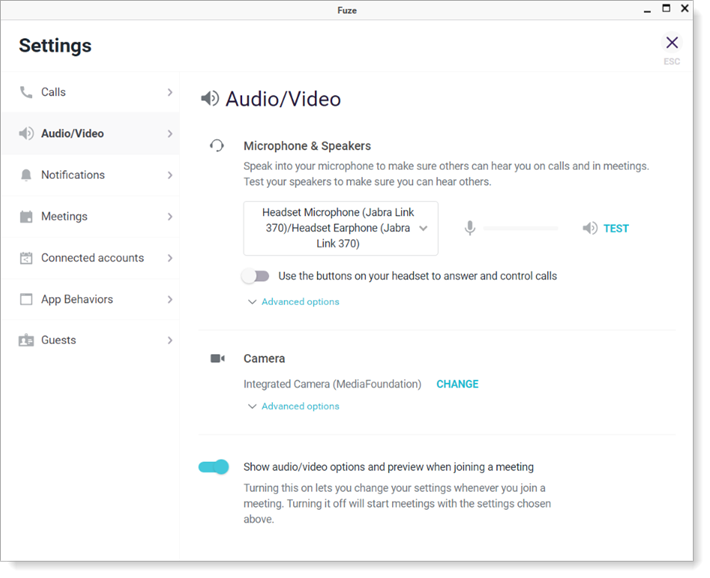
Microphone & Speakers Options
Use the Microphone & Speakers section to select and test the default microphone and speaker or other audio device you want Fuze to use for calls and meetings.
You can also change these options in the audio and microphone settings in the calls and meetings screens.
Configuring and Testing your Microphone or Speakers
- Click the drop-down list that displays your current microphone and speaker settings.
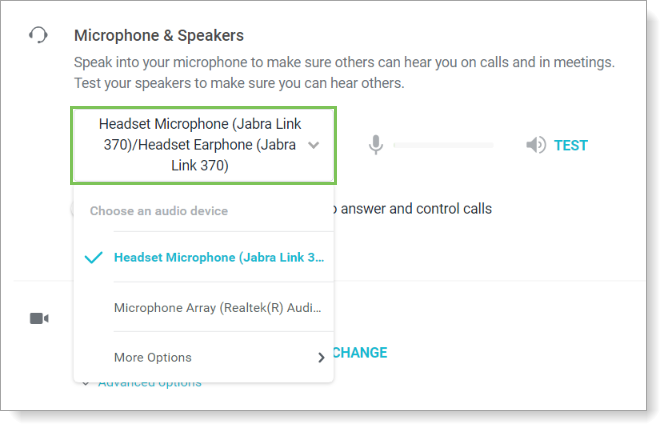
- Select More Options.
- In the Speaking via drop-down menu, select your microphone.
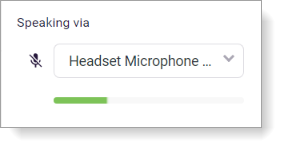
- Speak into your microphone and confirm the microphone is receiving your voice using the green sound level bar.
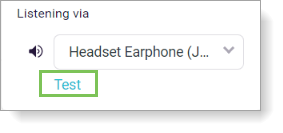
- In the Listening via menu, select your speaker or headset.
- Click Test. If your speakers are connected correctly, you hear a sound.
If you do not see your external USB or Bluetooth device in the audio options drop-down lists, confirm they are connected to your computer and turned on.
Advanced Microphone Options
Expand the Advanced options drop-down menu to configure settings for the active microphone.

-
- Enable acoustic echo cancellation: It improves voice quality by preventing echo.
- Enable automatic gain control: It automatically adjusts microphone sensitivity based on where participants are seated, making the conversations clearer for all participants.
If you're using a device with built-in microphone and speakers (e.g., a laptop), we recommend enabling both Acoustic echo cancellation and Automatic gain control for the best experience.
Camera Settings
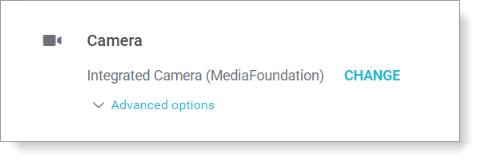
Use the Camera section to set, configure, and test your default camera and audio devices that Fuze Desktop uses for calls and video meetings.
Configuring and Testing Your Camera
Click Change to adjust your camera settings. The Audio & video (green room) screen appears, which includes options to select and test your audio and video devices.
See Audio & Video preview for more details.
Advanced Camera Options
The Advanced Camera Options allow you to configure your video settings based on your bandwidth requirements.
By default, Fuze uses Standard definition (SD) video quality, but you can select your video settings based on your bandwidth (internet connection speed) and connection quality using the information provided for each option.
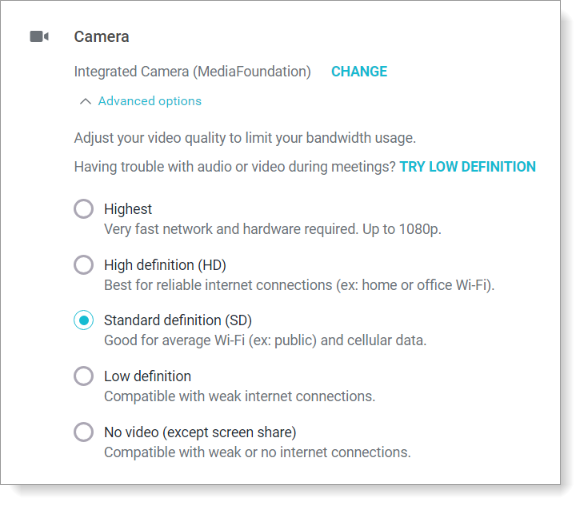
You can disable your integrated camera in Fuze Desktop by selecting No video (except screen share). Fuze Web does not currently offer this feature.
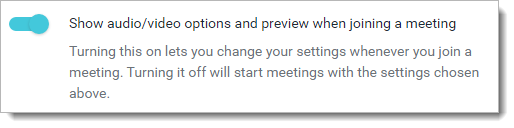
Show Preview and Options Before Joining Meeting
When this setting is enabled, an audio/video options preview window (also known as a green room) is displayed before you join each meeting. This allows you to adjust your video and audio settings before joining.
See Audio & Video preview for more details.